Key Takeaways
- The Unarchiver supports various archive formats like RAR and offers extra options that are missing in Archive Utility.
- Extracting files with The Unarchiver is simple and faster and allows for better customization.
- You can customize The Unarchiver’s settings, like changing the location of extracted files and automatically moving the archive to the Trash.
macOS’ native unarchiving tool, Archive Utility, lets you conveniently extract files on your Mac. However, it isn’t perfect, as it struggles with large files and doesn’t support many archive formats, like RAR. The Unarchiver app is perfect for this job.
What Can You Do With The Unarchiver?
The Unarchiver is a simple yet powerful app for extracting files on your Mac. It supports an exhaustive list of archive formats (including RAR files) and is totally free to use. The app includes a few extra options that Apple’s Archive Utility lacks, which are quite handy. And if needed, you can customize its behavior according to your preferences.
Download:The Unarchiver (Free)
Extracting archive files with The Unarchiver app is straightforward. First, install the app on your Mac from the App Store and then follow these steps:
- Open Finder and navigate to the folder that contains the archive file you want to extract.
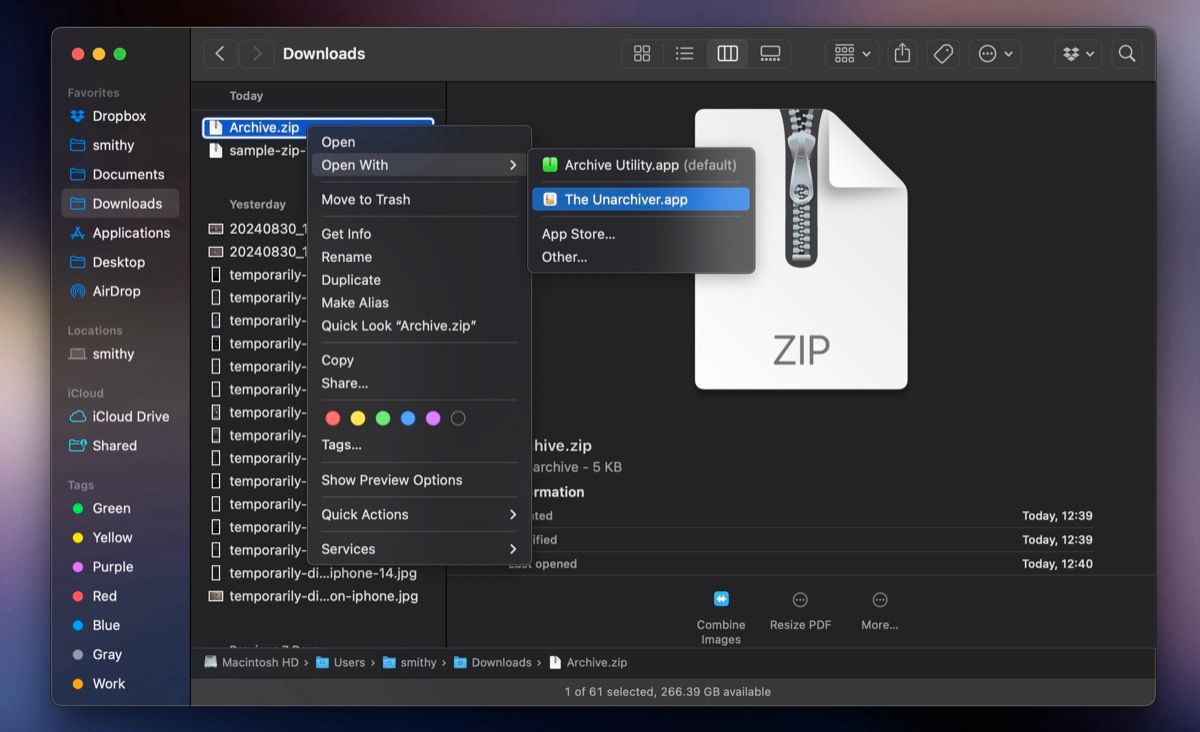
- Control-click the archive file, select Open With from the context menu, and choose The Unarchiver. (You can also select multiple files to extract them at once.)
The Unarchiver will then quickly unarchive the file. When it’s done, you’ll see an alert on the screen with a search icon next to the extracted files. Click this icon to quickly access the extracted file. Alternatively, you can navigate to the same folder that holds the archive to view the extracted files.
While you can follow the above process to unarchive files with The Unarchiver, there’s a better way to do it that can save you some clicks. It requires you to set The Unarchiver as the default file extraction tool in macOS. Here’s how to do this:
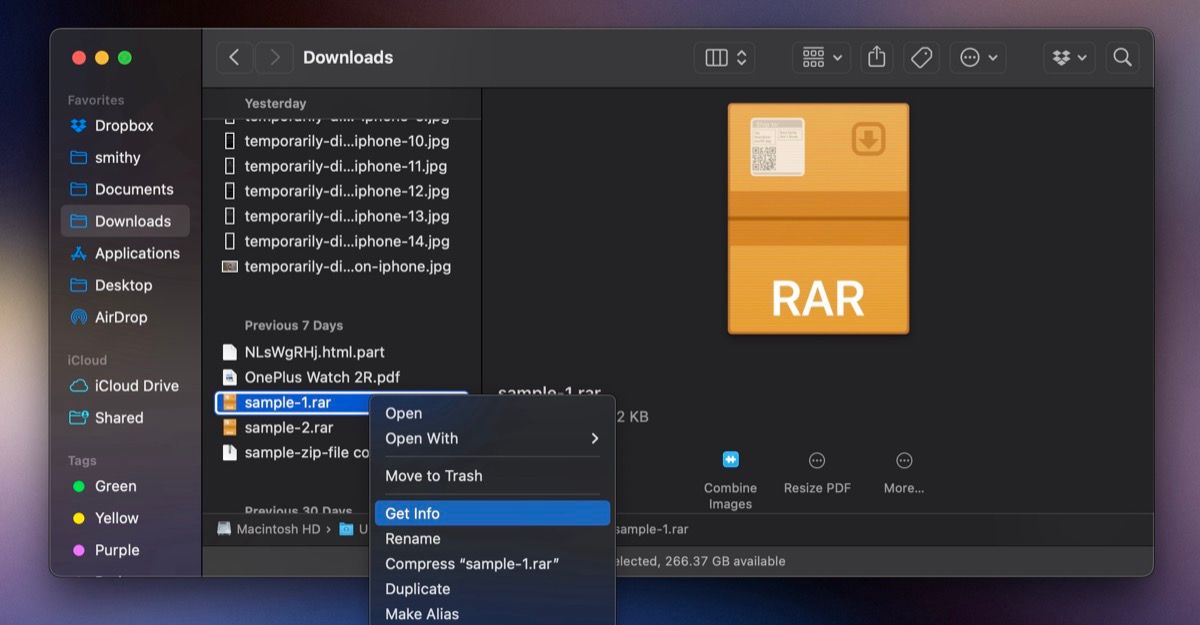
- Control-click an archive file and select Get Info.
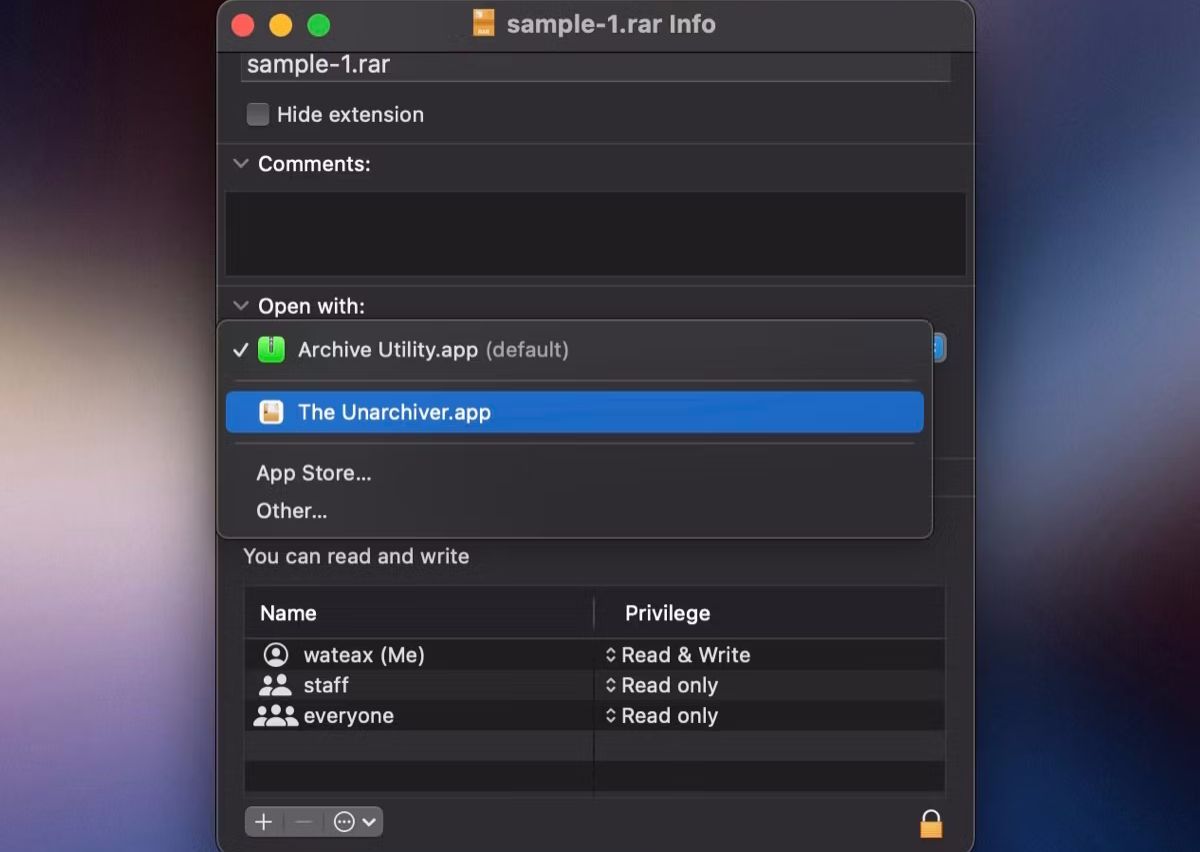
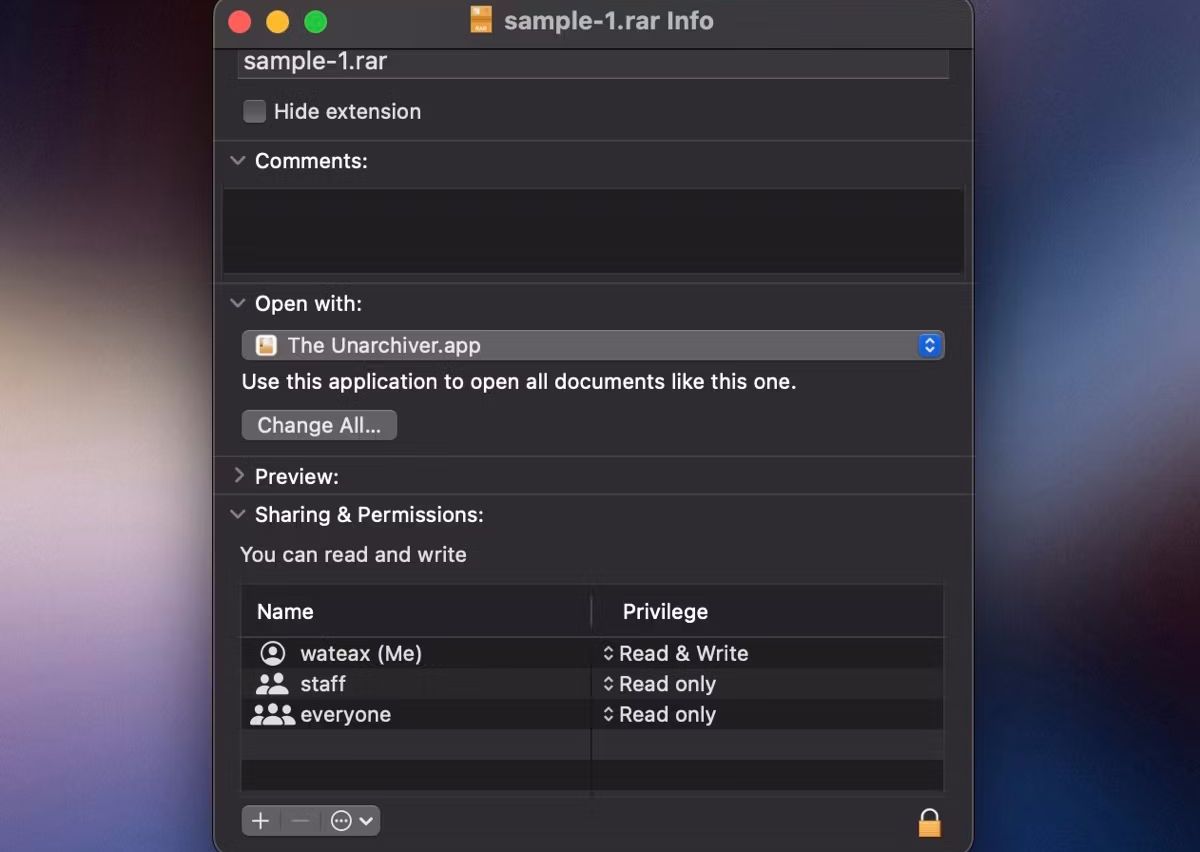
- Expand the Open with section. Click the drop-down below it and select The Unarchiver from the list of apps.
- Finally, click the Change All button. When prompted to confirm the change, click Continue in the pop-up.
The next time you want to extract an archive file, you can simply double-click it, and The Unarchive will extract its contents.
The Unarchiver Settings You Should Change
The Unarchiver offers some advanced options that you can use to customize its default extracting behavior. For instance, you can enable or disable archive formats as required. Likewise, you can choose where to extract archives, set the modification date of the created folders, or tell the app what to do post-extraction. You can do all of this from the app’s settings.
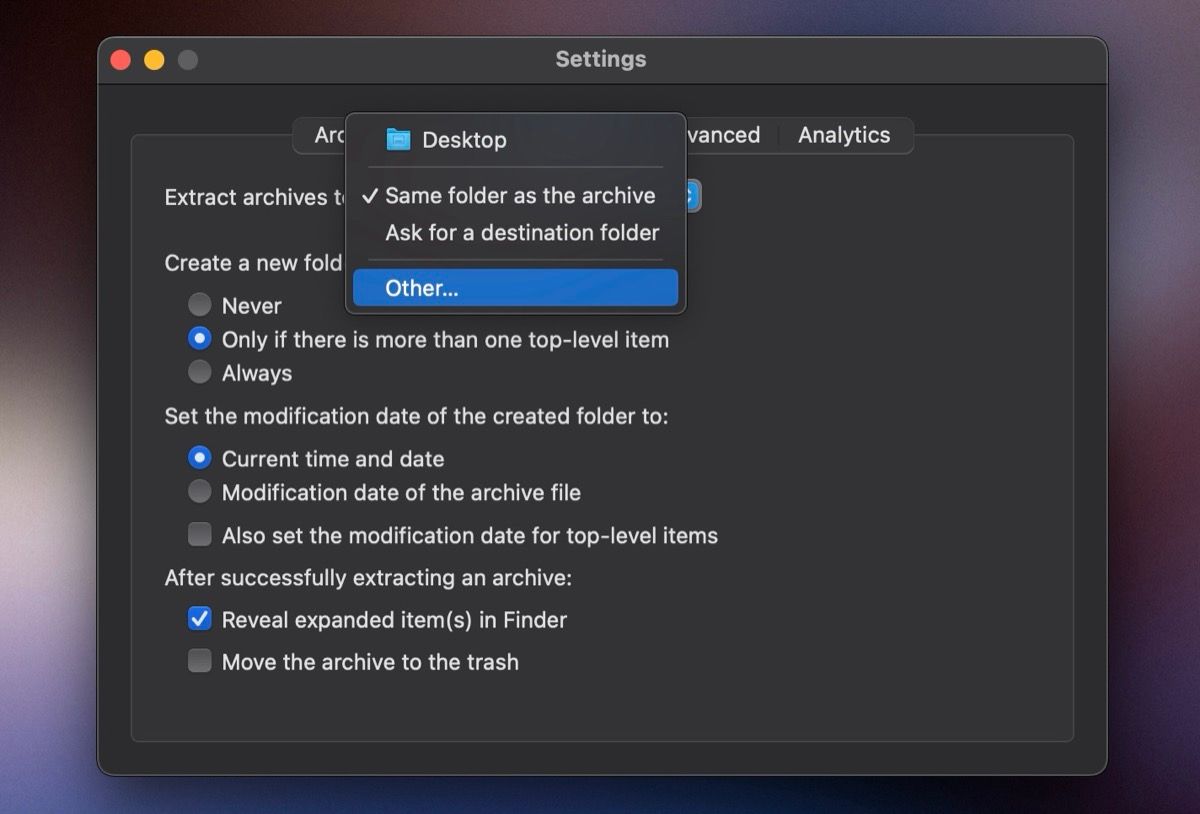
By default, The Unarchiver saves the extracted files in the same folder as the archive file. But if you don’t like this, you can change the extraction location according to your preference.
Launch The Unarchiver and go to the Extraction tab. Click the drop-down beside Extract archives to, select Other, and choose your preferred folder.
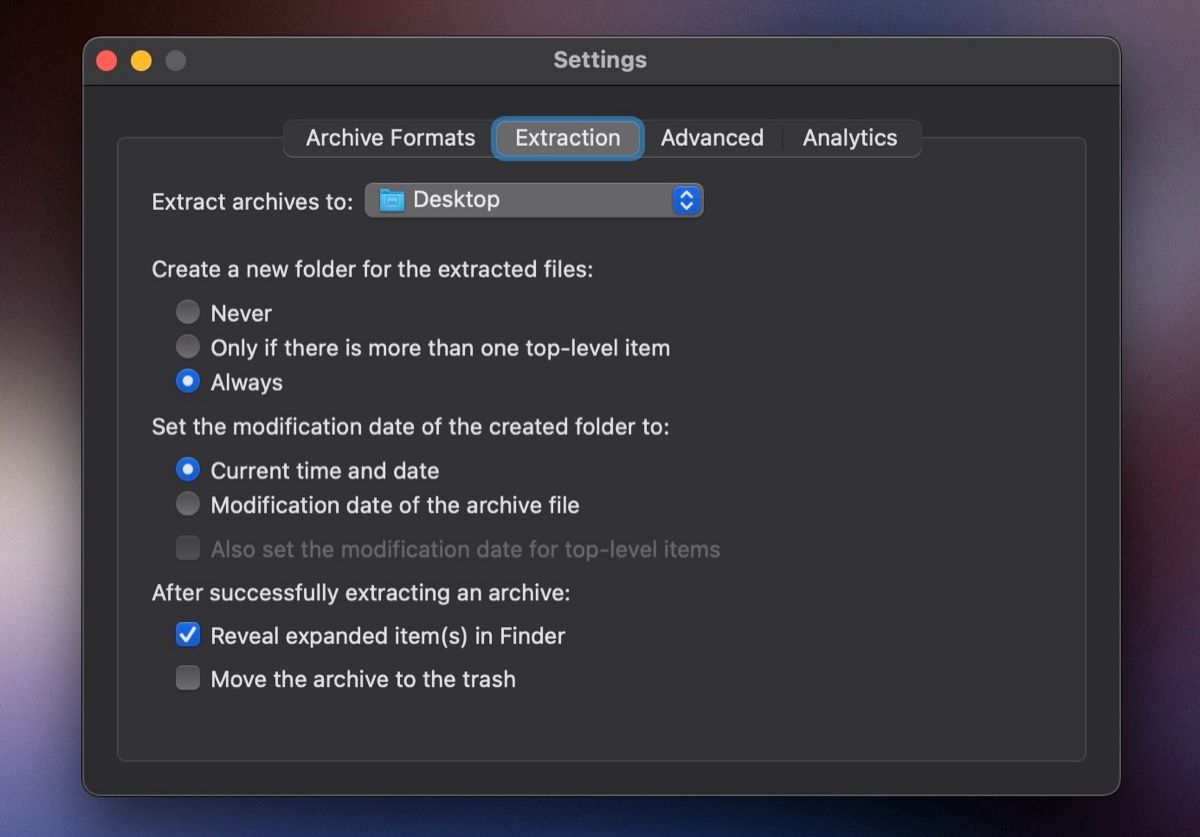
Extracting all your archived files into a single folder will end up cluttering it, which, in turn, could make finding files challenging. To avoid this, you can set The Unarchiver to create a new folder every time you extract an archive and save all its content into it.
Just set the Create a new folder for the extracted files option to Always, and you’re set.
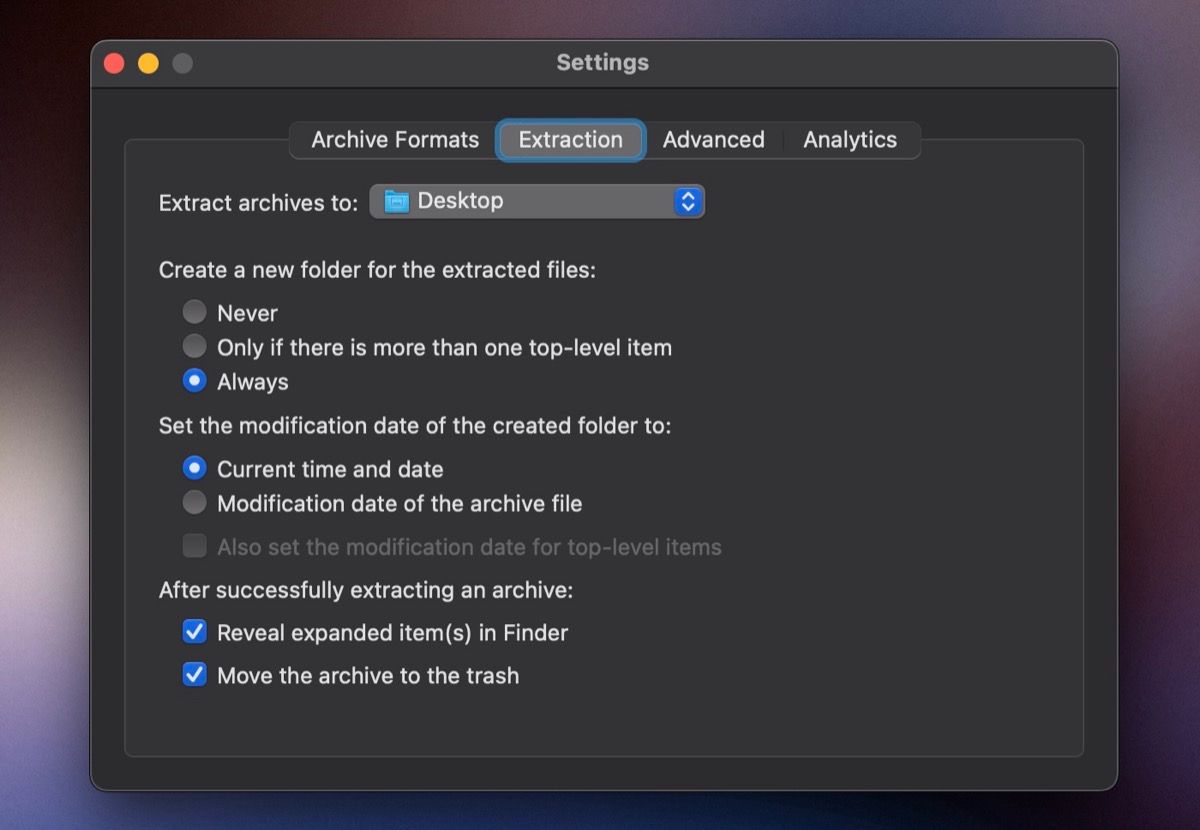
There’s no point keeping the archive files once you’ve extracted them—unless you really need them later. Most of the time, they end up hogging your Mac’s storage space. To avoid this, the Unarchiver has an option that automatically deletes archive files after extraction.
To enable it, check the box next to Move the archive to the trash at the bottom of the Extraction tab. Note that you can restore an archive file from the Trash if you need it later.
The Unarchiver is an essential third-party utility for all Mac users; it’s always one of the first apps I install on a new Mac. That said, I’d like it if The Unarchiver also allowed archiving files, as that’d save us the trouble of installing another third-party Mac app for this specific purpose.

