Key Takeaways
- Ensure you have an HDR-compatible display and updated graphics drivers to experience HDR on Windows 11.
- Use Windows HDR Calibration software to optimize color accuracy and brightness for a better visual experience.
- If you have a supported TV, experiment with tone mapping modes for improved HDR performance.
My HDR display works great with Windows 11 for gaming and video streaming. But to be honest, it didn’t look that great out of the box. However, I tweaked some settings to get the best HDR experience possible, which I’ll share below.
What You Need to Get Started With HDR on Windows
To enable HDR, you need an HDR-capable display. You also need a compatible source device; in this instance, a Windows 11 PC with either an integrated or dedicated GPU that supports HDMI 2.0, DisplayPort 1.4, USB-C, or Thunderbolt. Be sure your GPU drivers are also up-to-date.
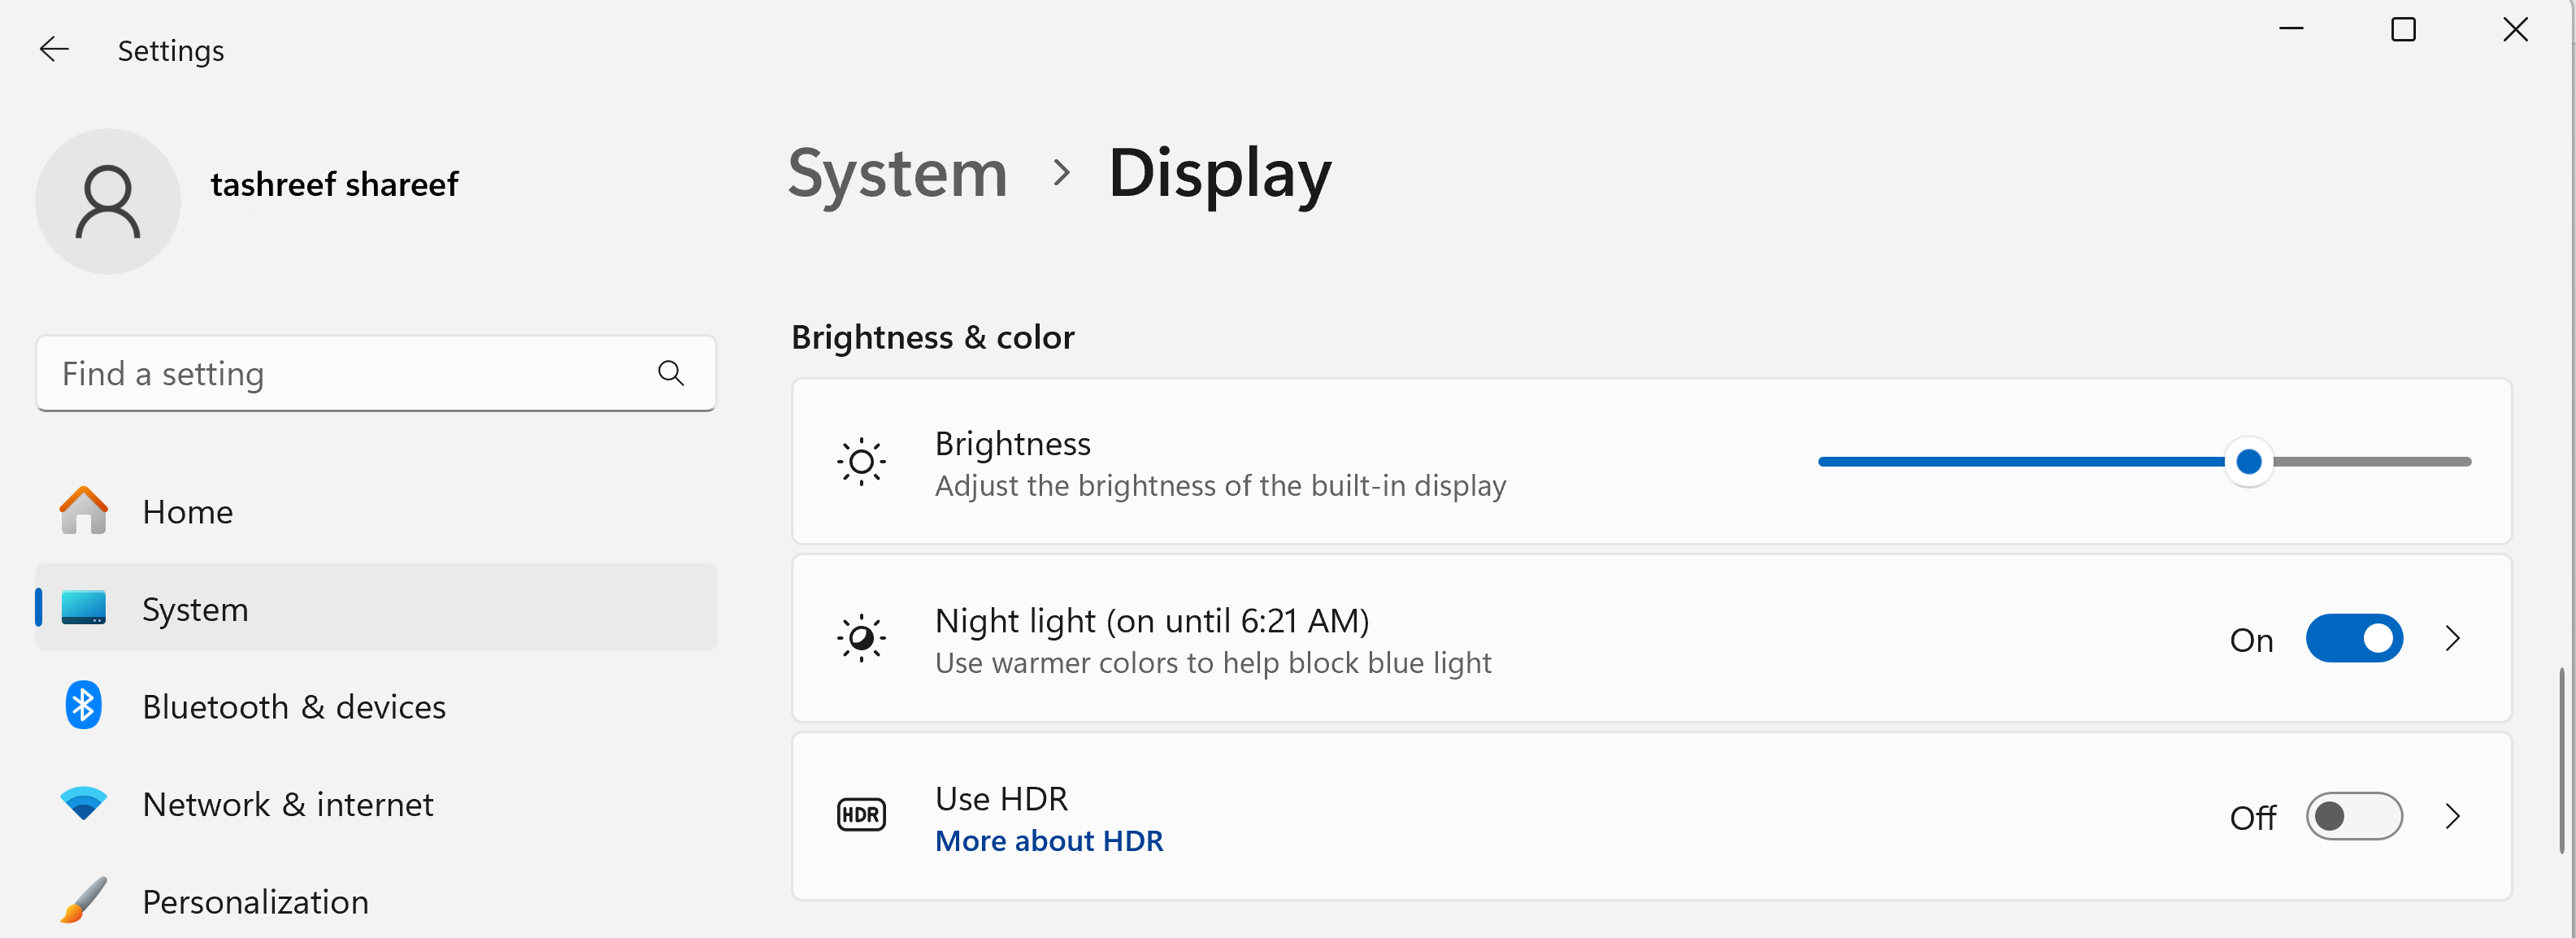
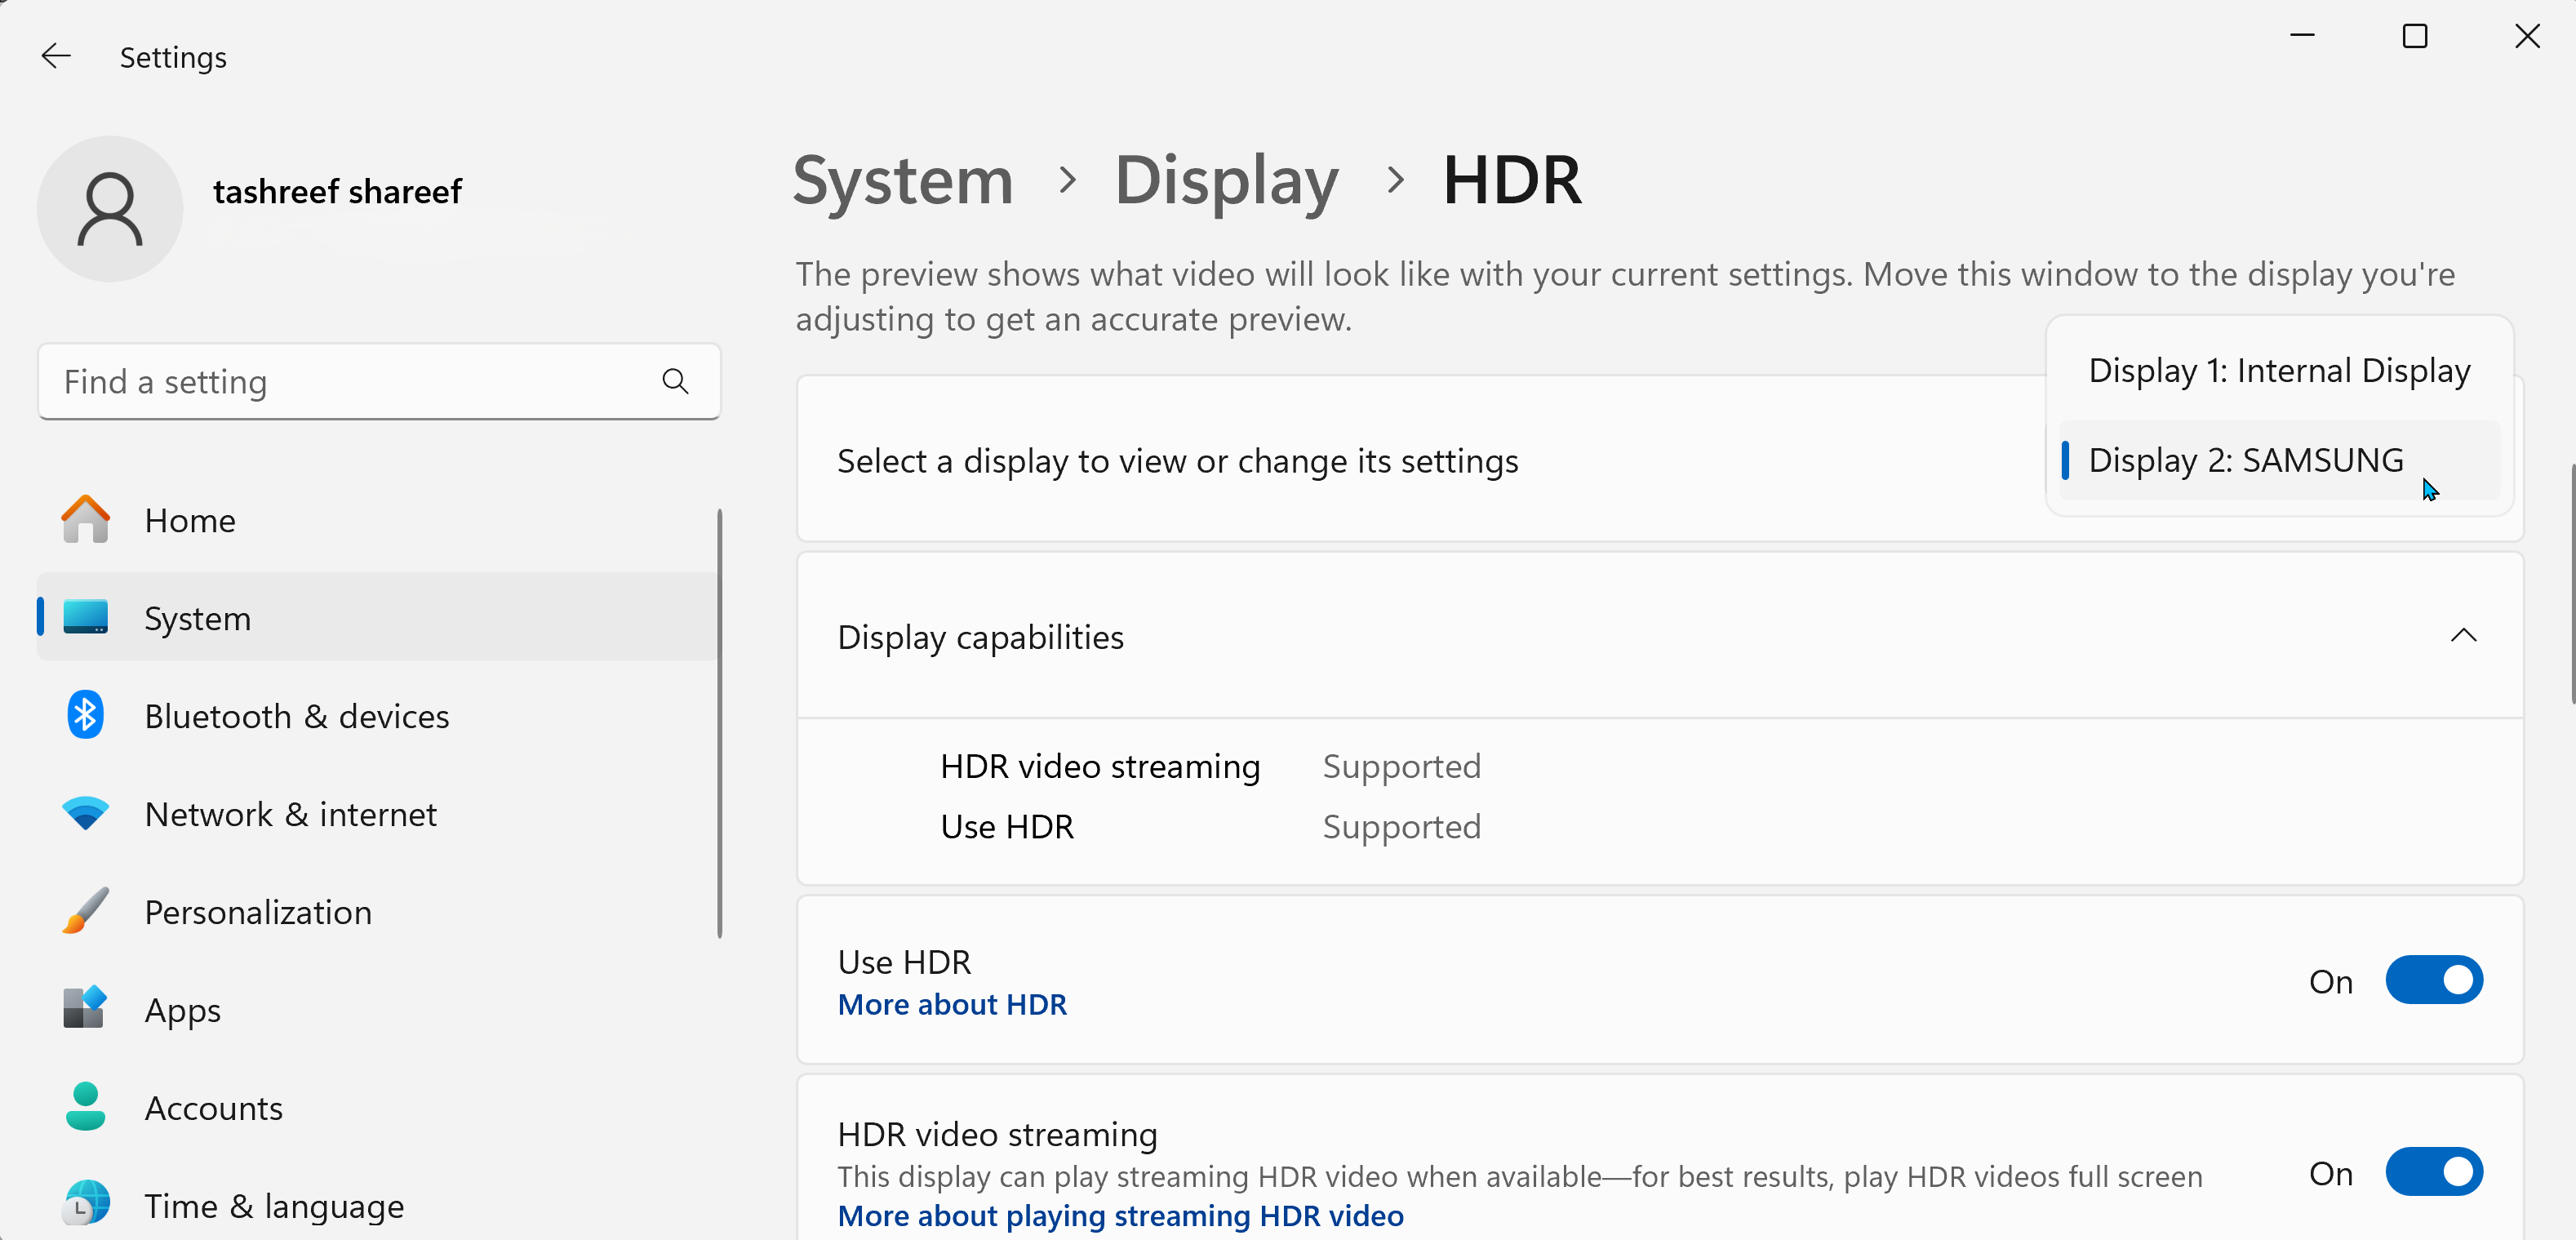
To determine if your monitor supports HDR, press Win + I to open Settings and go to System > Display. Select Use HDR under the Brightness and Color section. If you have a multi-display setup, choose the HDR-capable screen from the Select a display to view or change its settings drop-down.
If your display supports HDR, you’ll see Supported next to both Use HDR and HDR video streaming with a Use HDR toggle to turn on HDR.
Why Does Windows 11 Show HDR as Not Supported?
The most common reason is that you have a non-HDR display. Check your monitor’s specifications on its official website to know if it supports HDR. The other causes include outdated graphics drivers or HDR being disabled in your external display settings.
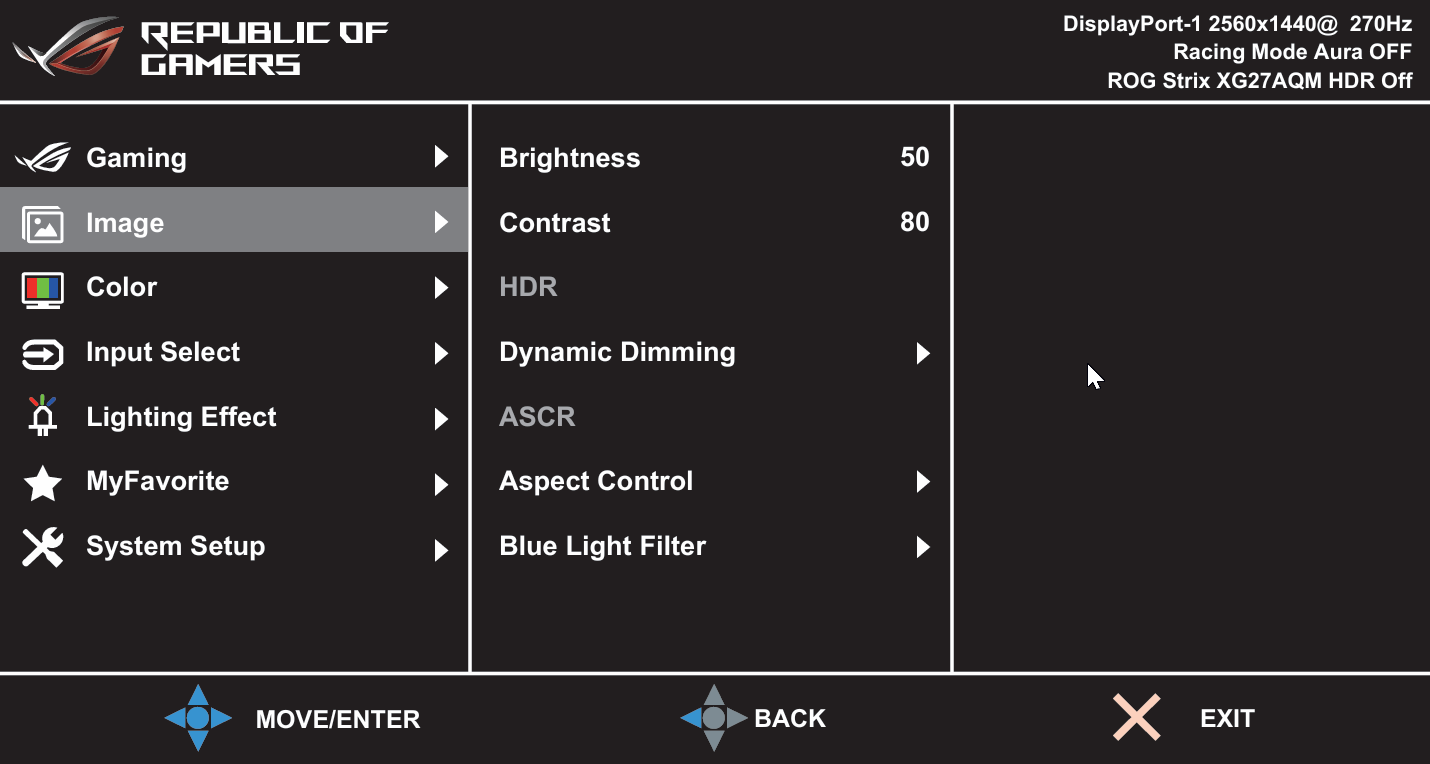
For external monitors, like the Asus ROG Swift, you can enable HDR through the monitor’s OSD menu. You can access this menu by pressing a physical button that’s typically located below or behind the monitor.
Once you’re in the OSD menu, go to Image > HDR and make sure the HDR option is enabled. Some monitors may have multiple HDR options, such as AMD FreeSync2 HDR, Gaming HDR, or Cinema HDR.
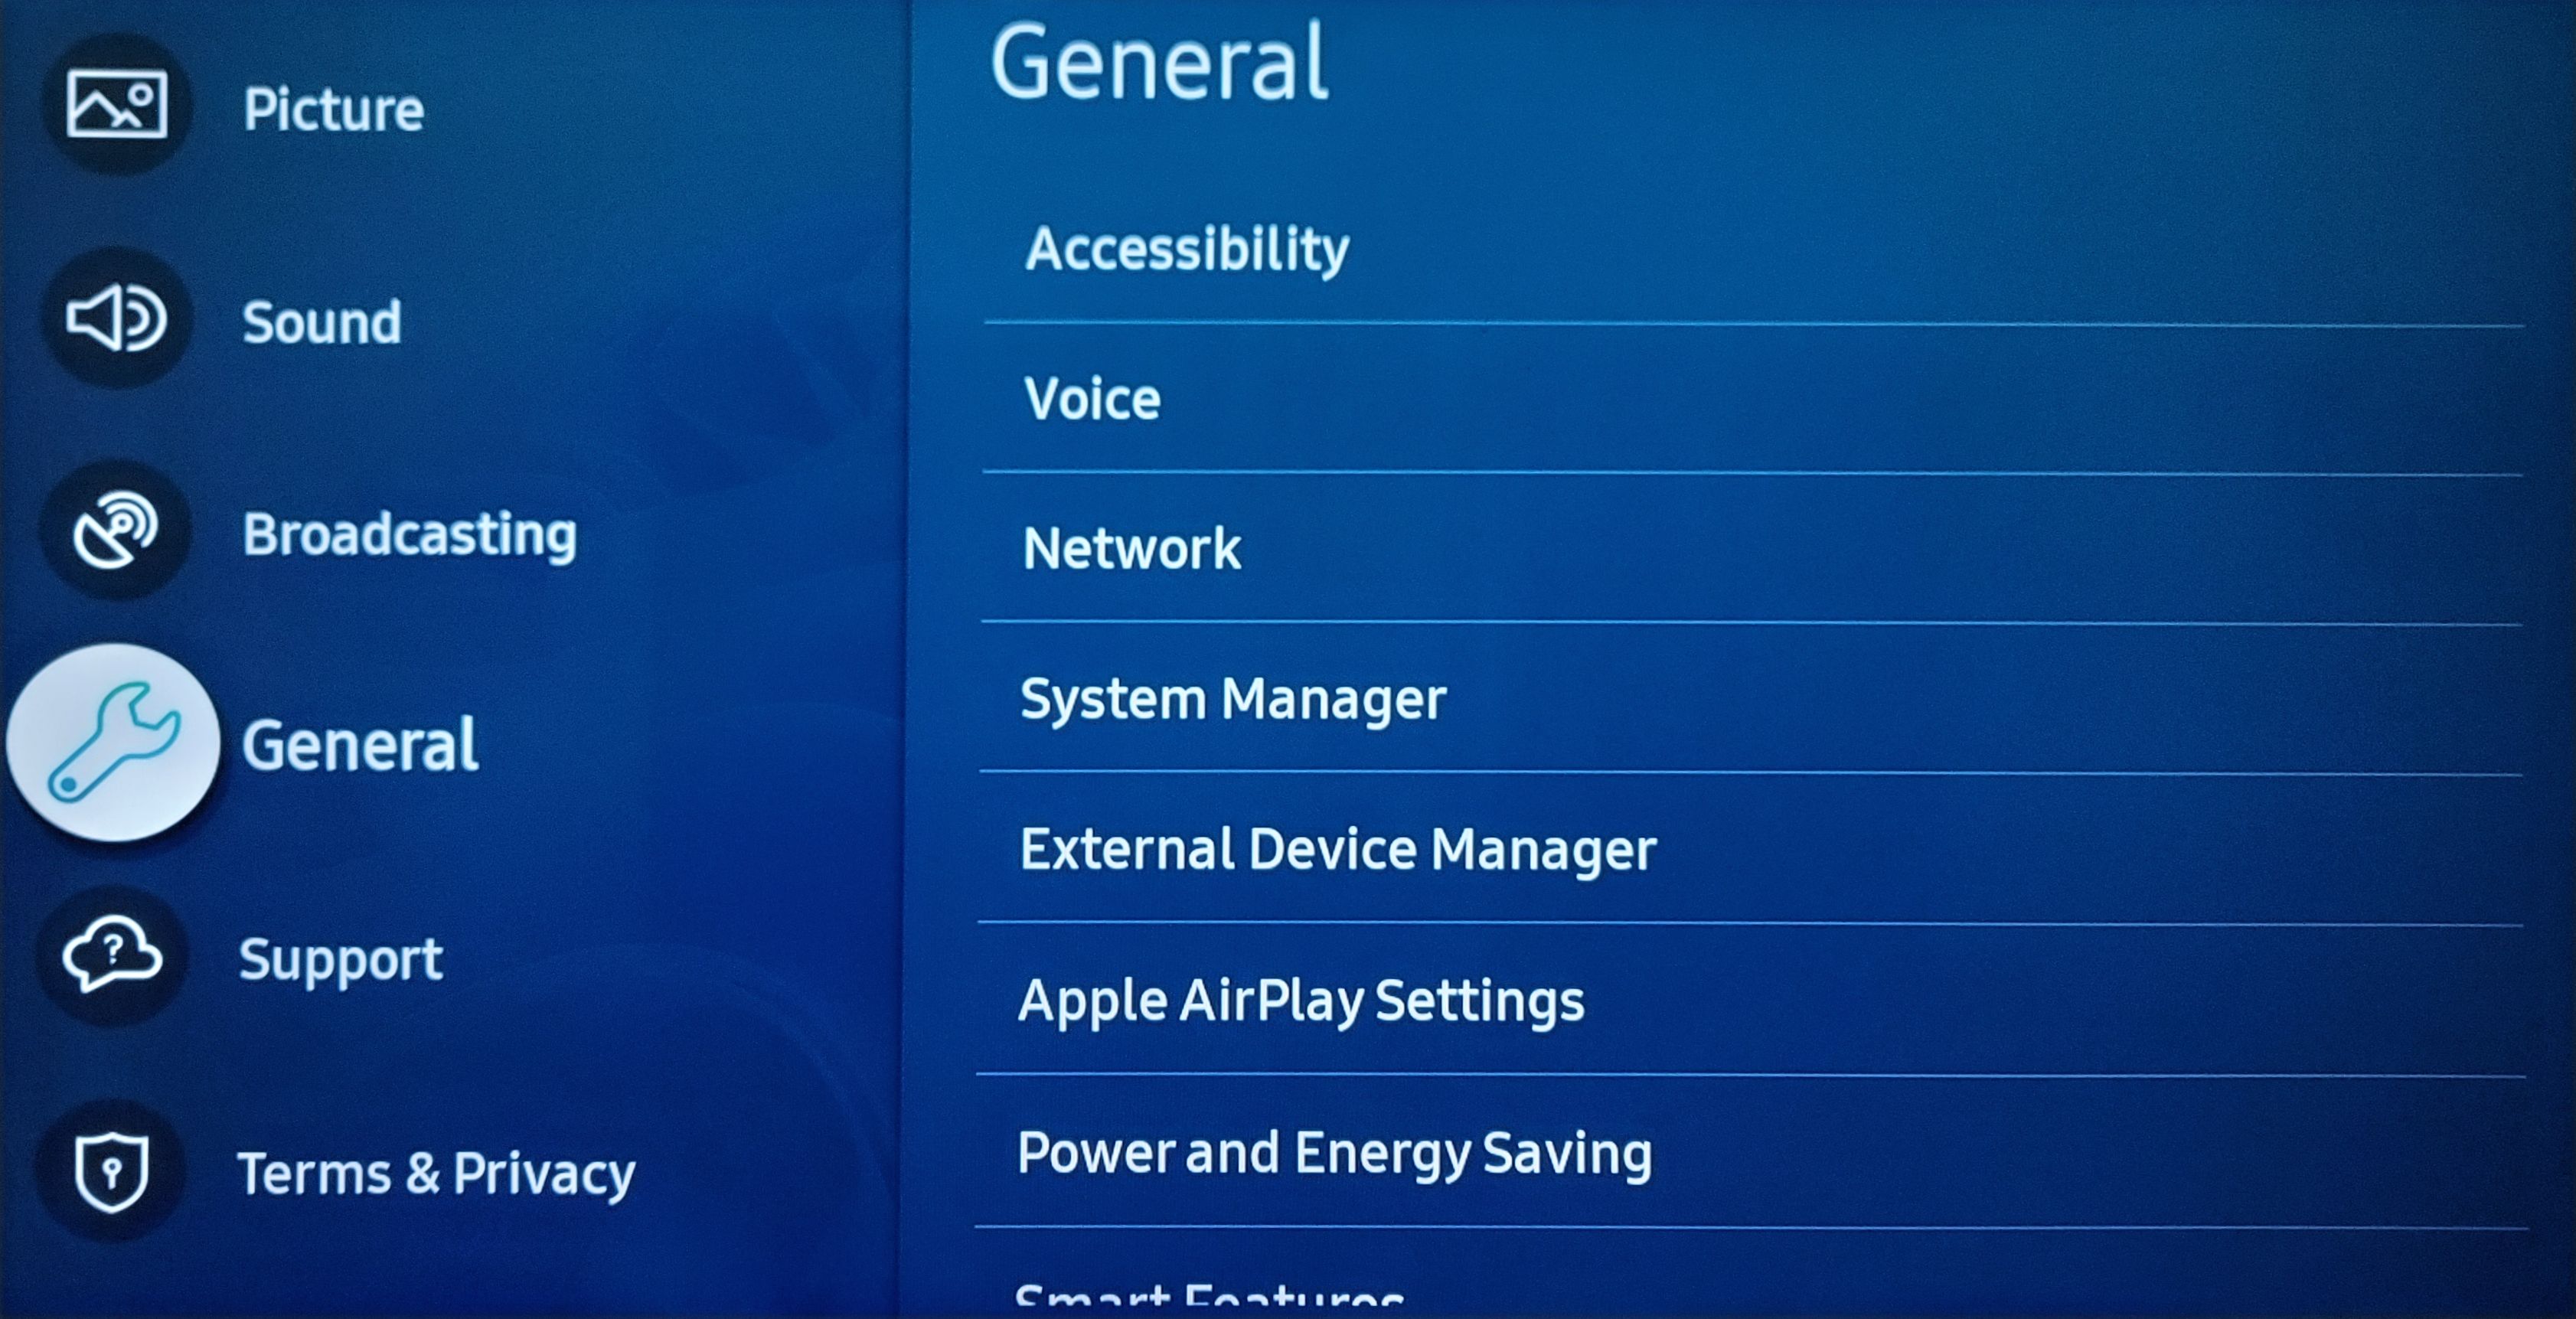
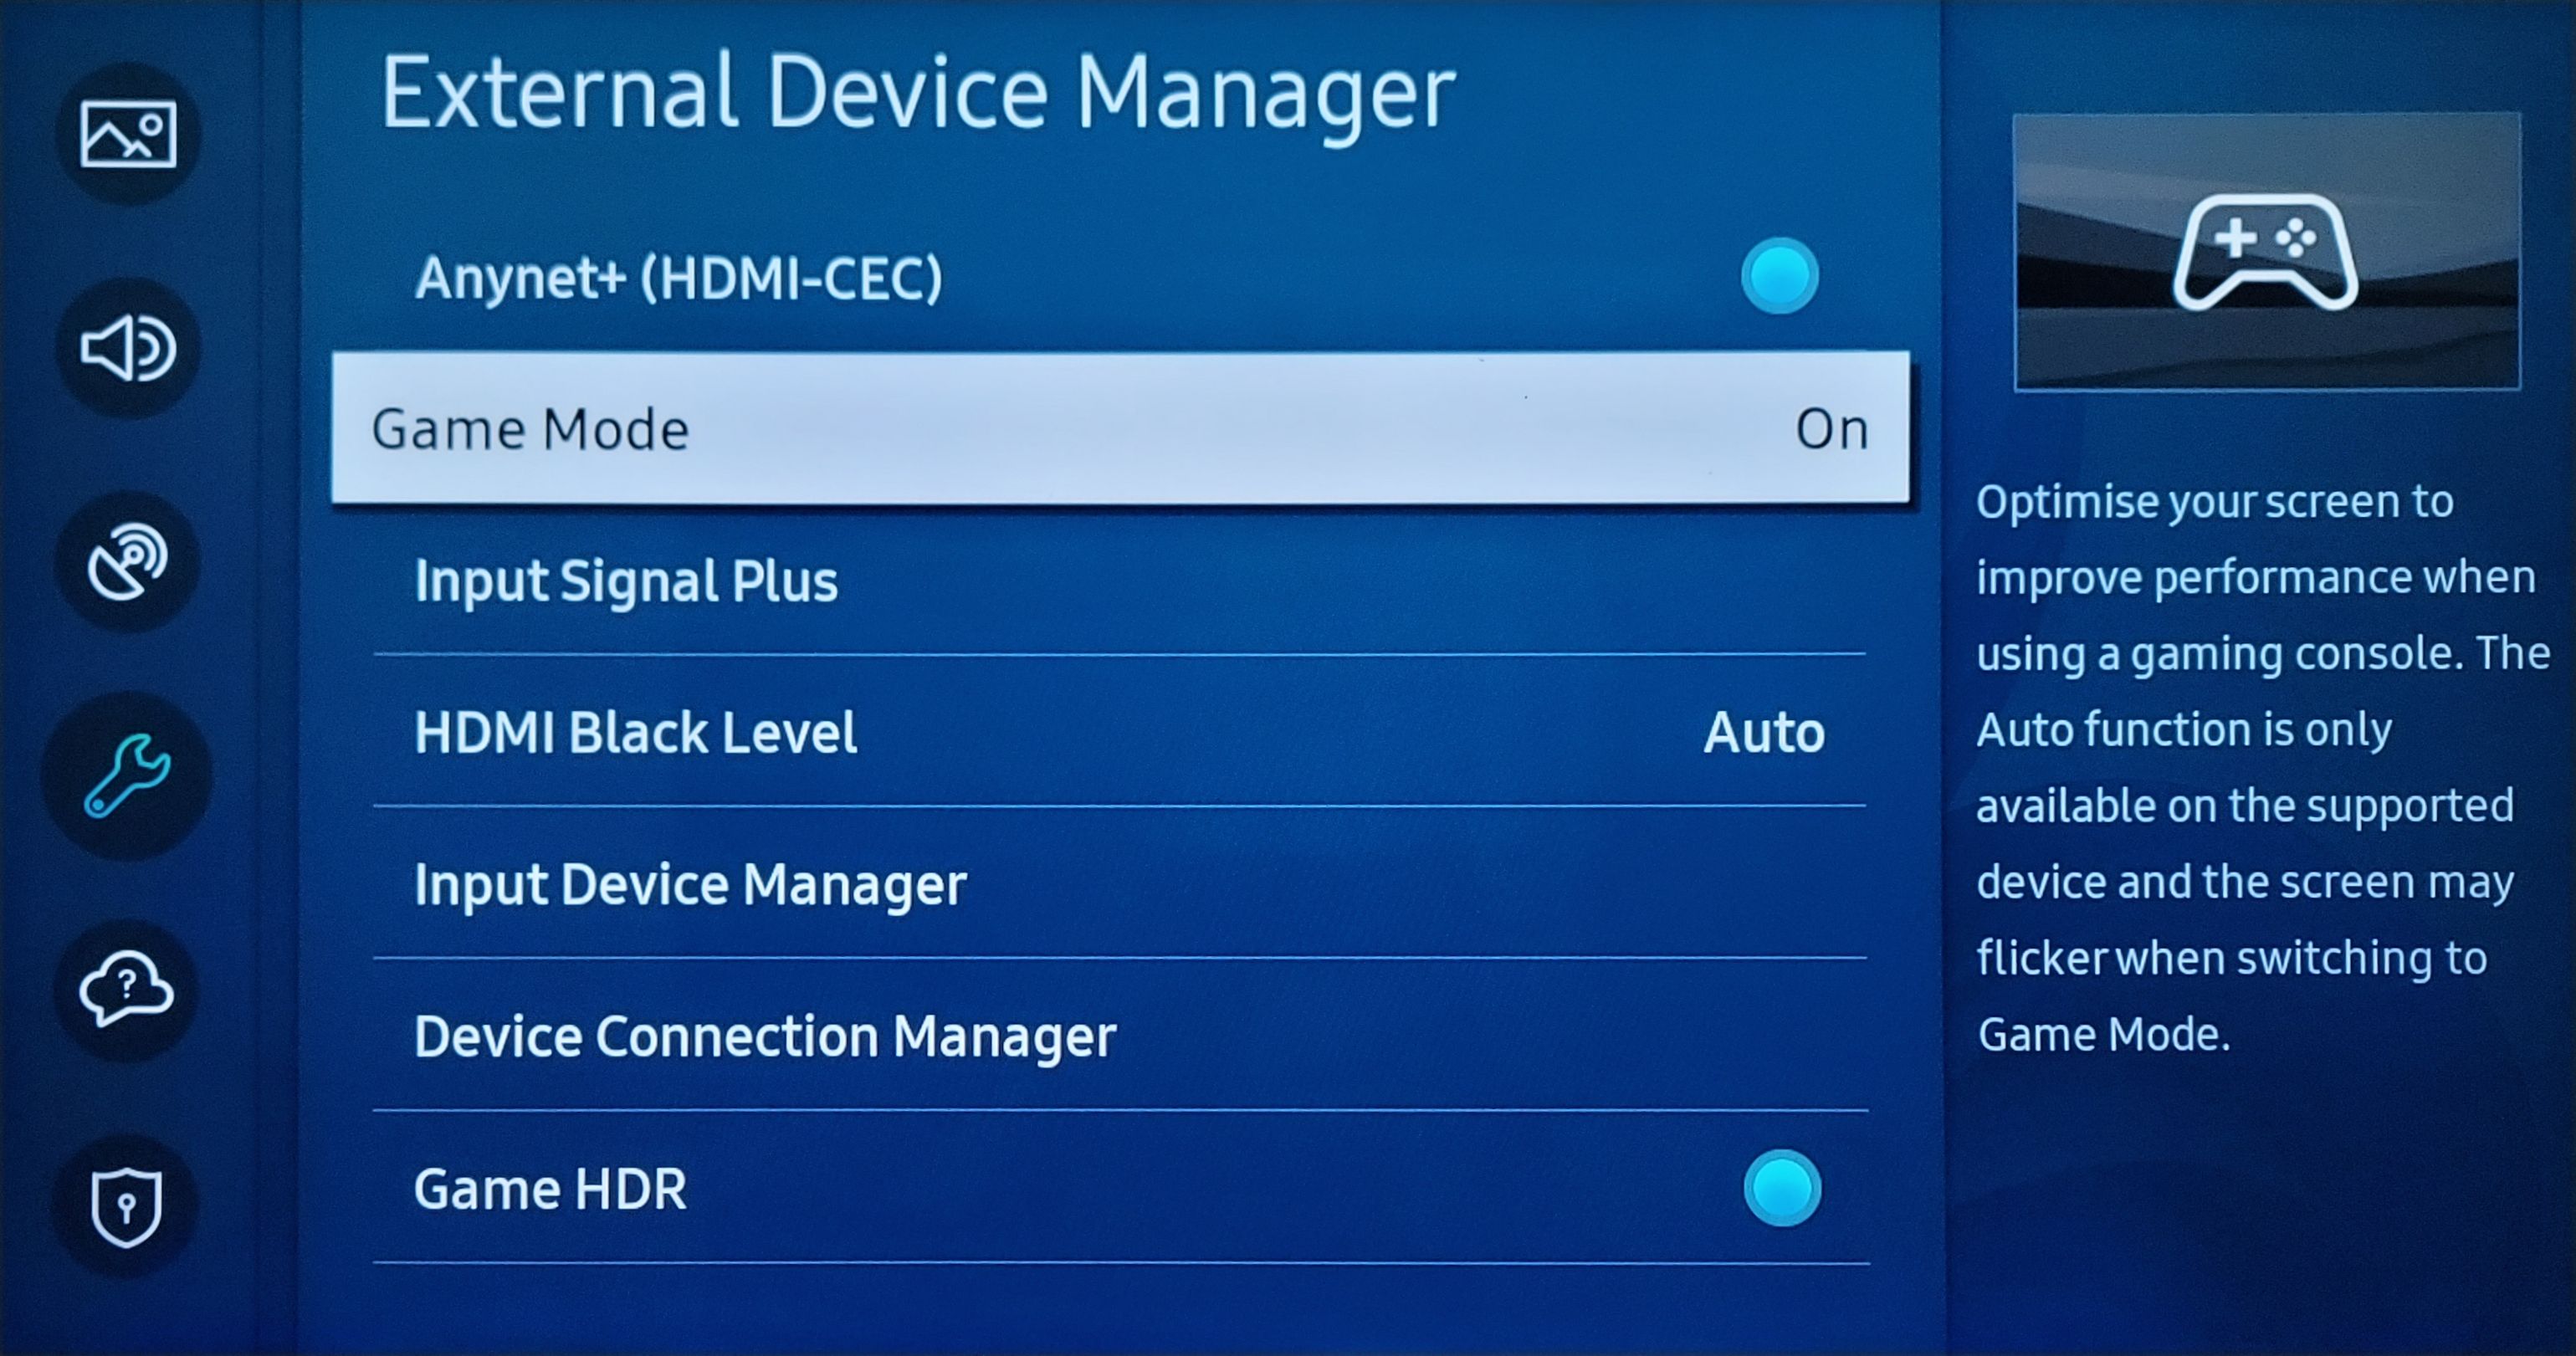
On a TV, you might need to turn on Game Mode to activate HDR on Windows 11. The steps to enable HDR and game mode may vary by manufacturer. For instance, to enable HDR on a Samsung UHD TV:
- Press the Home button on your TV remote, then choose Settings.
- In the Settings menu, open the General tab and select External Device Manager.
- Set Game Mode to On. Then, enable the Game HDR option.
Additionally, to play HDR video on streaming platforms, you may also need specific codecs. Netflix requires the HEVC extension, but it costs $0.99 on the Microsoft Store. The other two extensions are VP9 to play YouTube videos in HDR and AVI, both of which are often pre-installed on your PC.
How to Enable HDR and AutoHDR in Windows 11
You can enable HDR from the Settings app. Head to Settings > System > Display, then click Use HDR. If you have multiple displays connected, choose the HDR-capable screen from the Select a display to view or change its settings drop-down.
Toggle the Use HDR switch to turn it on. Your screen may go blank or flash momentarily as the HDR turns on. You can also turn on HDR video streaming to watch HDR content over streaming platforms like YouTube.
Windows 11 also offers Auto HDR, which automatically enables HDR for compatible SDR games. While not all games support Auto HDR, many popular titles do, including Minecraft, HALO: Master Chief Collection, Call of Duty: Warzone, and Assassin’s Creed Mirage.
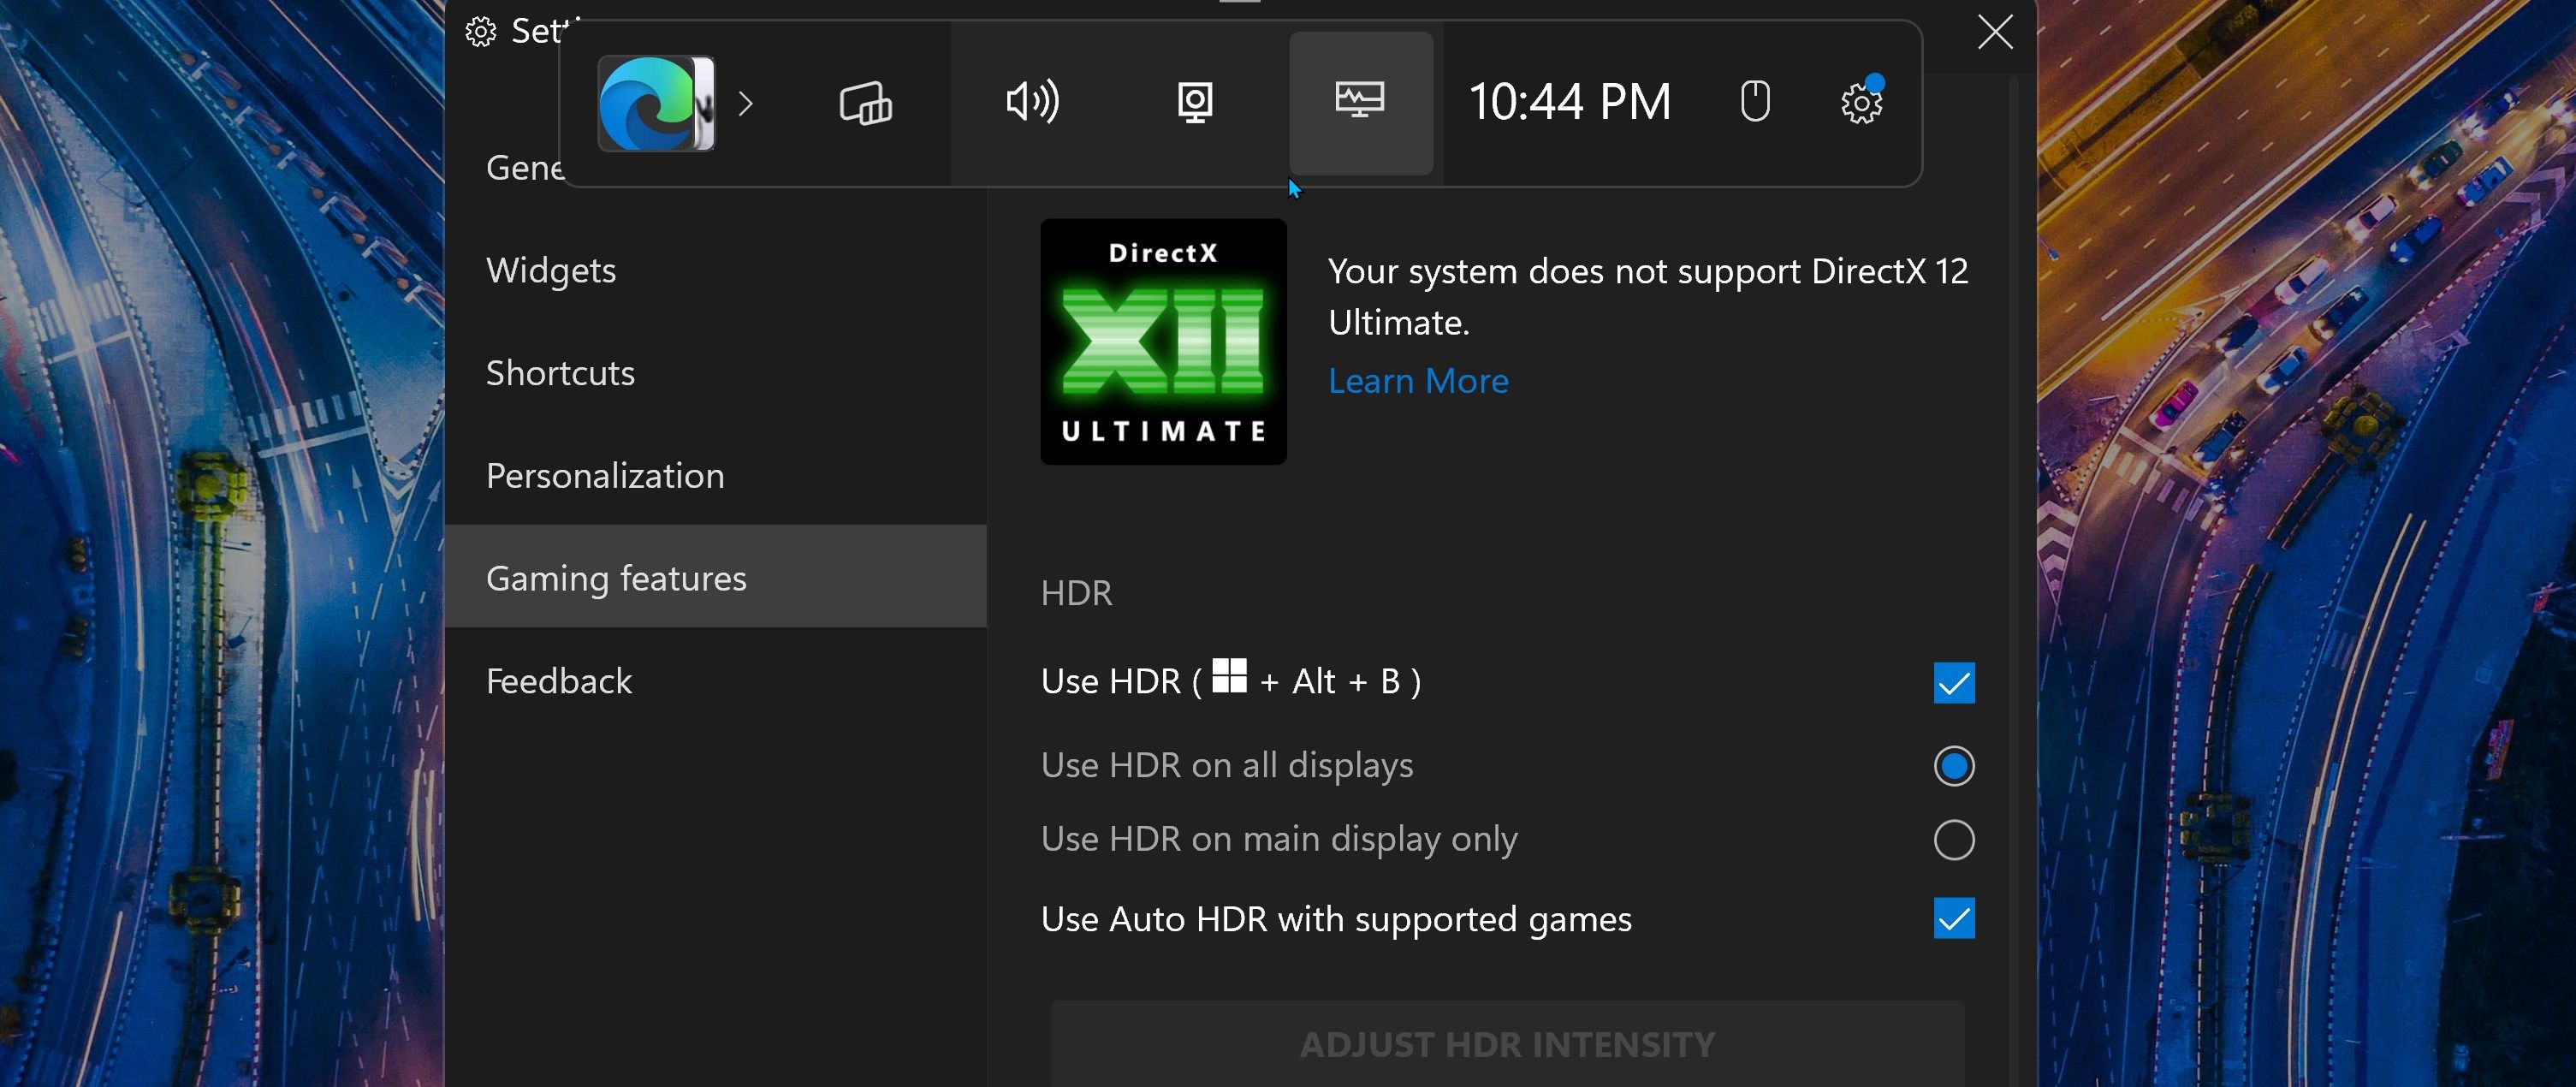
You can also enable HDR using Game Bar. To do this:
- Press Windows + G to open Game Bar. Then click Settings (Gear icon) in the toolbar at the top.
- Select Gaming features from the left pane of the window that opens.
- Under HDR, check the box next to Use HDR (Windows + Alt + B). Then, select HDR on all displays or Use HDR on the main display only.
With the Game Bar settings configured, you can quickly turn HDR on or off with the Win + Alt + B shortcut.
Calibrate Your HDR Display With Windows HDR Calibration Software
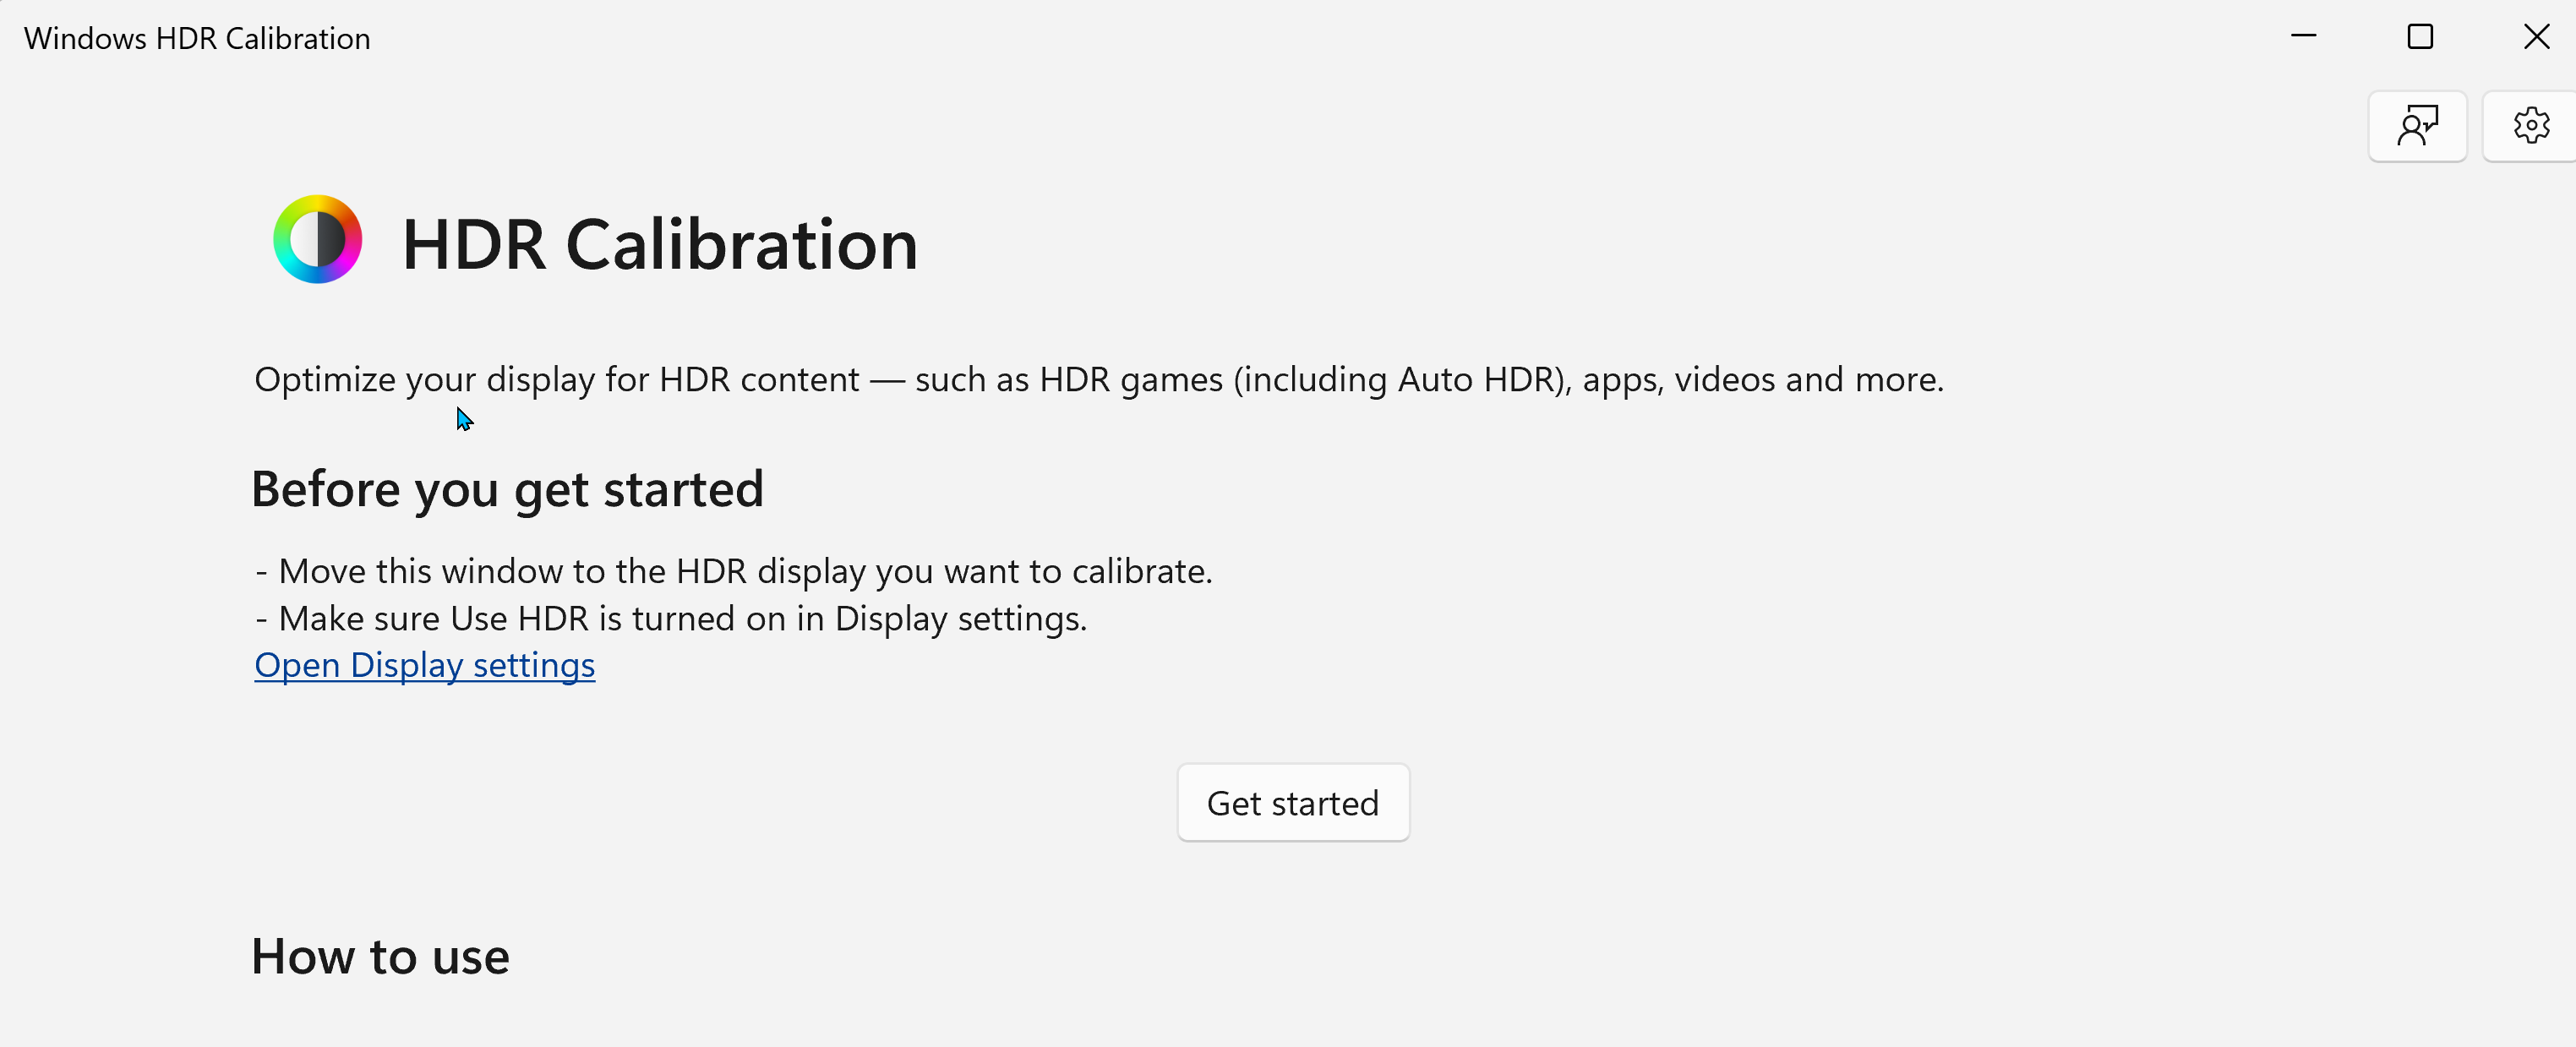
The Windows HDR Calibration is an official monitor calibration tool that helps you create an optimized color profile to improve color accuracy for your HDR display. To get started:
- Download and install the Windows HDR Calibration app from the Microsoft Store. Upon launch, move it to the HDR display you want to calibrate and click Get Started.
- The tool will walk you through the calibration process to adjust Minimal Luminance, Maximum Luminance, Max Full-Frame Luminance, and Color Saturation. Simply adjust the sliders until the box disappears.
- Once done, review your new color settings, enter a name for the color profile, and click Finish.
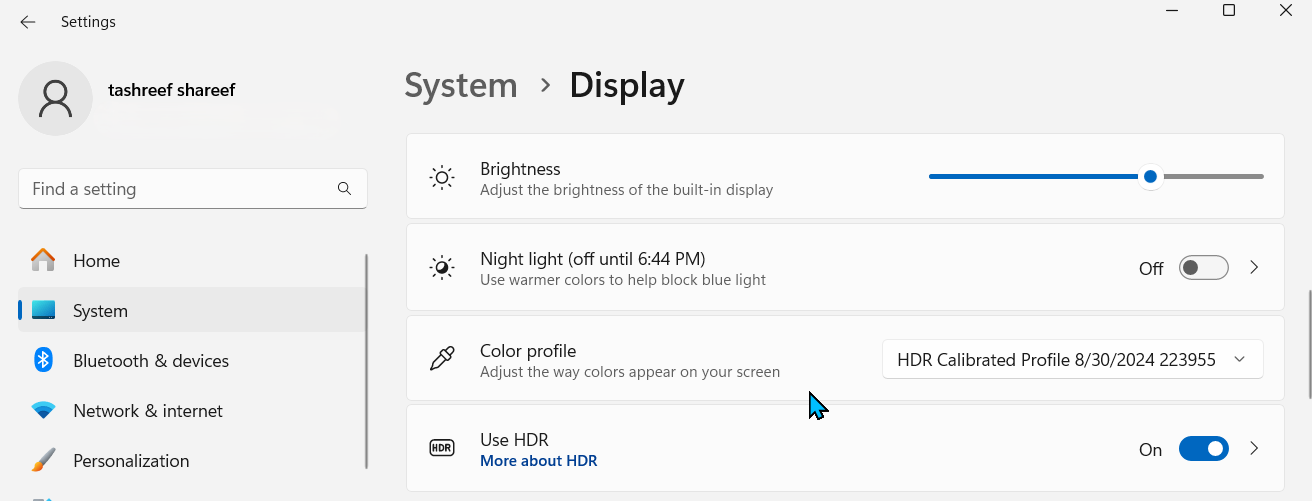
To apply the new color profile, go to Settings > System > Display. Then, under Brightness & Color, click the Color profile drop-down menu and choose your newly created color profile. If further adjustments are needed, explore additional calibration methods to calibrate your monitor for accurate colors.
Adjust HDR Tone Mapping and Game HDR Settings on Your TV
If the HDR content still appears slightly off, check your TV’s tone mapping settings. Whether or not to use tone mapping is a personal preference, but switching between dynamic/active and static tone mapping can help you maintain details without making the screen too bright or too dark.
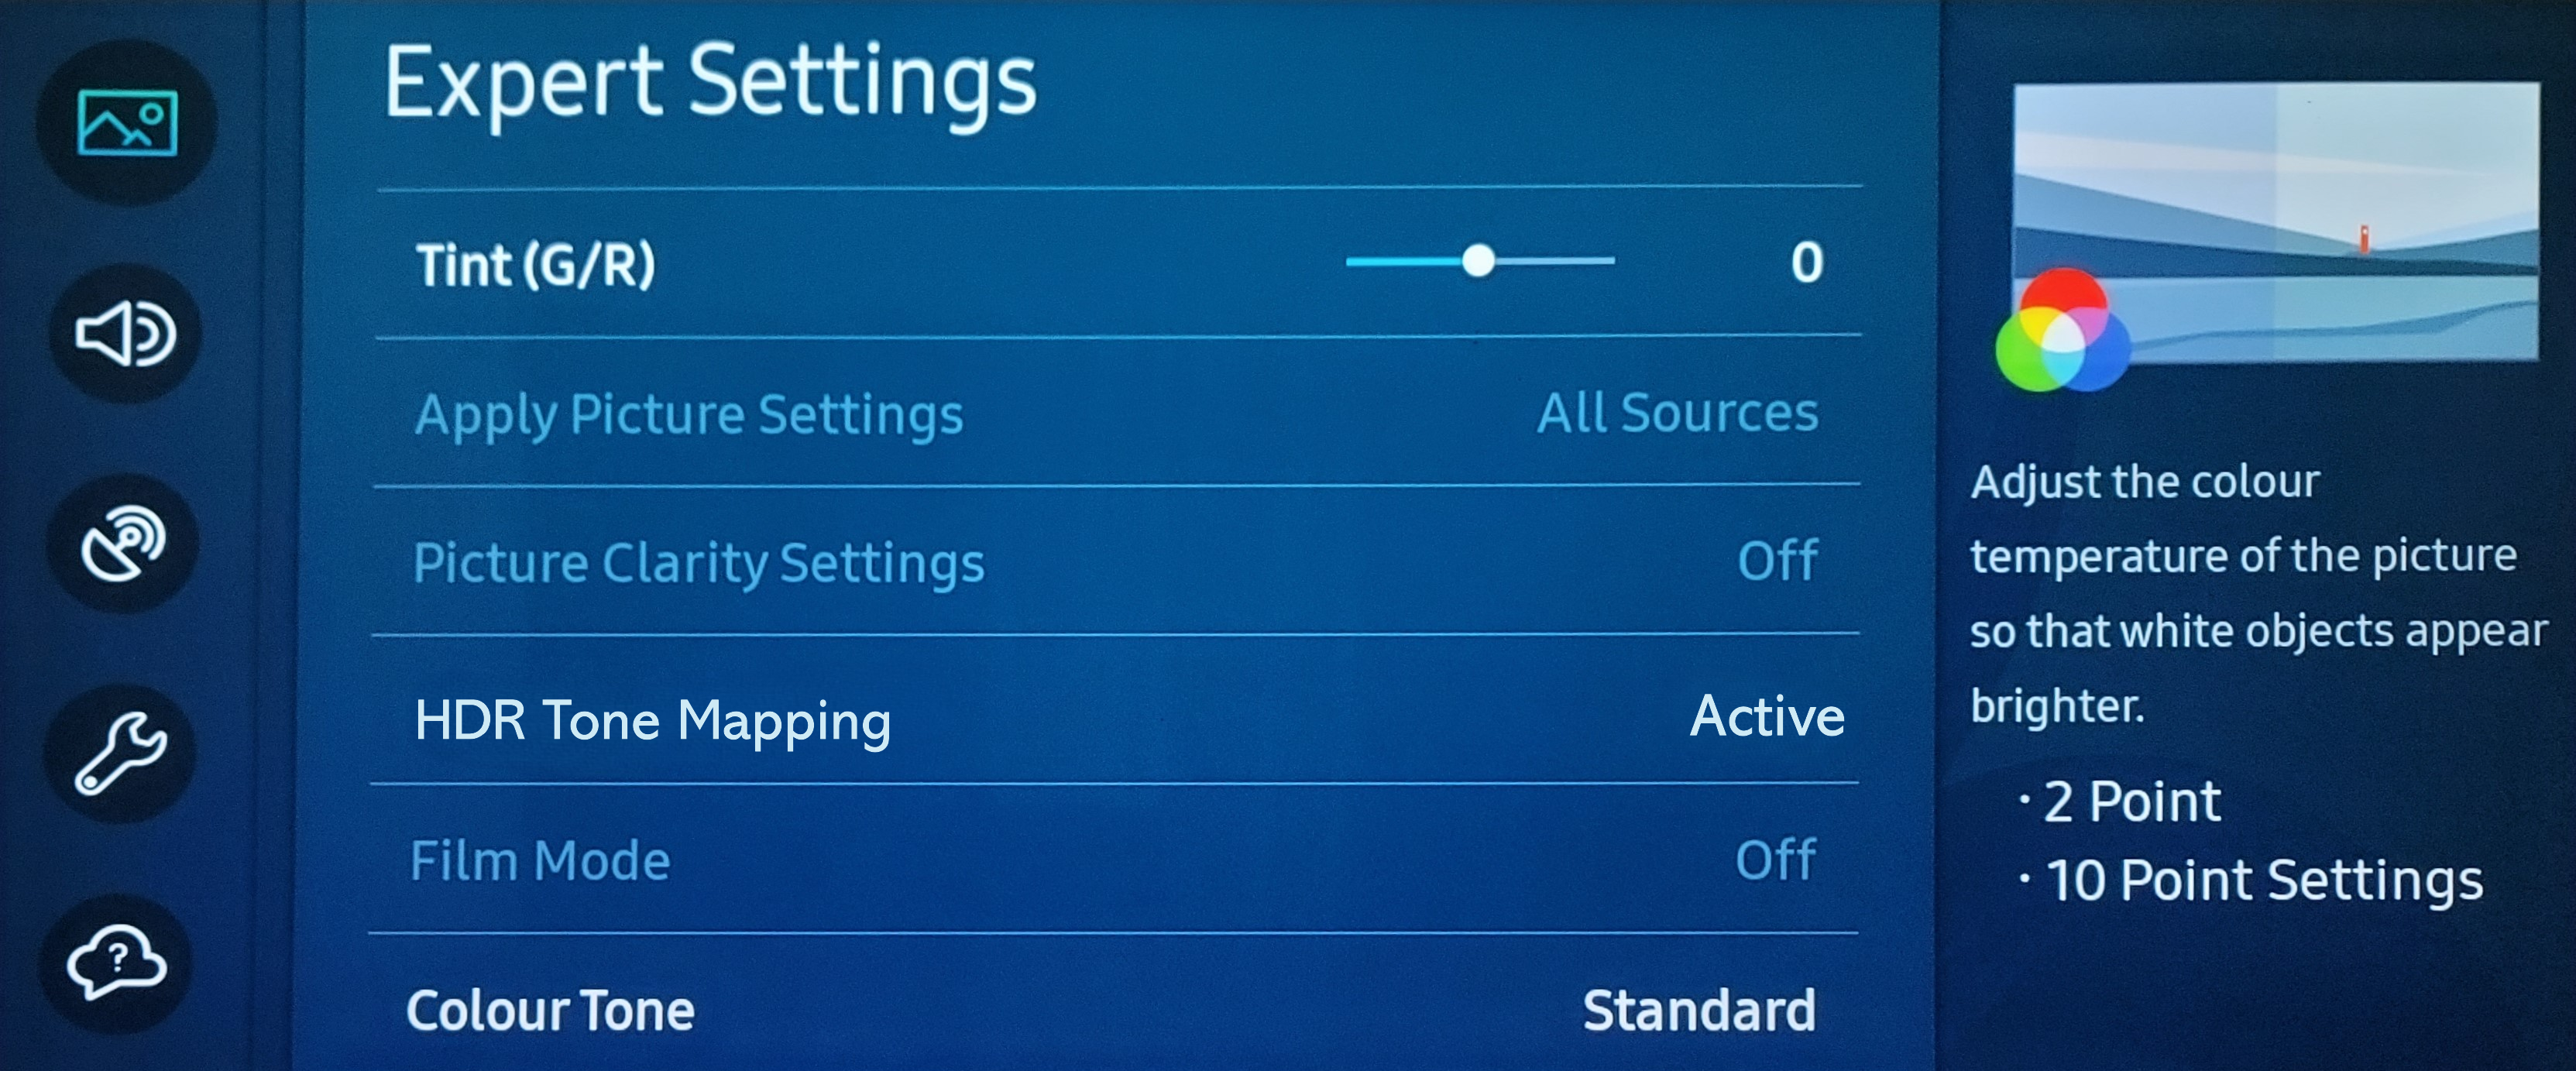
Since different TV manufacturers apply tone mapping differently, you’ll need to experiment to find what works best for you. Here’s how I adjust it on my Samsung TV:
- Go to Settings > Picture > Expert Settings.
- Select HDR Tone Mapping, then choose from the Static and Active options.
I prefer to use Static as it offers more accurate graphics. But feel free to experiment with the Active mode to see if it improves your visual experience.
Some TVs, like the LG C2, support the HGiG mode to automatically adjust the content color in games to meet the creator’s intention. Similarly, Samsung TVs use HDR in accordance with the HGiG standard, so you may not need to fiddle with the tone mapping settings unless necessary.
Once you’ve enabled HDR in Windows 11 and calibrated your display, check and enable HDR in your game settings, if available. For instance, to enable HDR10 in Cyberpunk 2077, go to Settings > Video > HDR Mode and set it to HDR10 PQ or HDR10 scRGB.
Optimizing HDR on Windows 11 allows you to experience games and movies in the way intended by the creators. With these tips, you can make the most of your expensive HDR display in Windows 11.

