
 #gorillatag #shorts
Key Takeaways
- Outlook rules simplify email management and save time by automatically organizing incoming messages.
- Creating rules in Outlook is fairly straightforward—just set triggers, actions, and exceptions for the automated action.
- I use Outlook rules to automatically mark emails from specific senders as important, archive unnecessary emails, move emails with attachments to a separate folder, and much more.
Managing email can feel like a never-ending chore, but with Outlook rules, I’ve found a way to automate the mundane tasks and bring order to the chaos. Here’s a quick overview of what Outlook rules are and how I’ve used them to streamline my email management and boost productivity.
What Are Outlook Rules and How Are They Useful
Outlook rules are automated actions that help manage incoming emails based on specific criteria. With Outlook rules, I can create a set of instructions that Outlook follows whenever a new email arrives in my inbox. This way, I can control what happens to emails from specific senders, those containing particular keywords, or emails that arrive at certain times or exceed a specified size.

With these rules in place, my inbox essentially manages itself, eliminating the need to manually sort emails. Important emails are prioritized, while routine or low-priority messages are seamlessly managed in the background. This approach has transformed how I handle emails, reduced clutter, and saved a significant amount of time.
Creating a Rule in Outlook
Creating a rule in Outlook is fairly quick and easy. For that, I only need to set the condition or trigger that will activate the rule and specify the actions to be taken when that condition is met. I can also set exceptions to the rule if needed. For example, I might create a rule that filters out all marketing emails except those from a specific sender I trust.
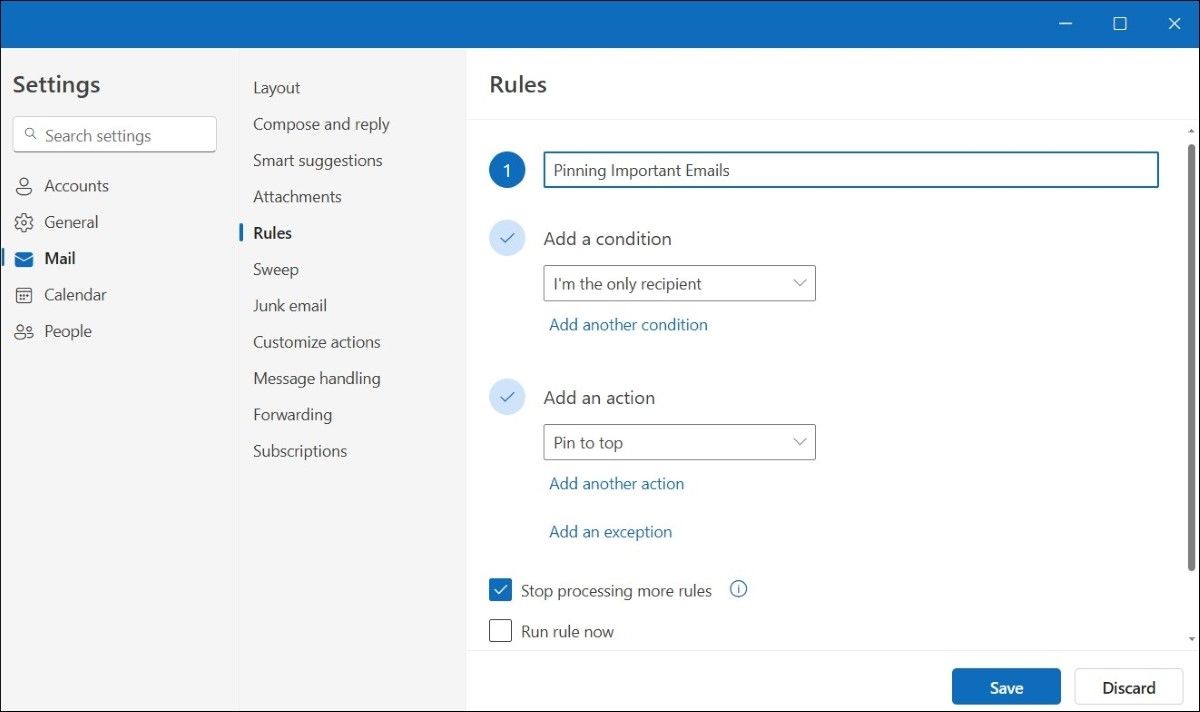
To create a rule in Outlook, you can follow these steps:
- Open the Outlook app and click the gear icon in the top right corner.
- Go to Mail > Rules.
- Click the Add new rule button.
- Use the drop-down menu under “Add a condition” to select a trigger.
- Use the “Add an action” menu to specify what Outlook should do with the email.
- Tick the Stop processing more rules checkbox if you don’t want any more rules to run after this one does.
- Tick the Run rule now to apply it to your existing emails.
- Click the Save button.
Similarly, you can create more rules by repeating the steps outlined above. Outlook also allows you to add multiple conditions and actions to tailor the rules to your specific needs. So, you can be creative in setting up rules that fit your workflow perfectly.
Outlook Rules That Help Me Manage My Inbox

Outlook’s powerful rules help me streamline my workflow and allow me to focus on what’s most important. Each of these Outlook rules serves a specific purpose in helping me maintain control over my inbox. Together, they form a cohesive system that streamlines my email management and minimizes the time I spend sorting through messages.
Here are some of the key rules I’ve set up to eliminate distractions and manage my inbox efficiently.
Flag Emails With Attachments for Review
Attachments often contain important information, such as reports or contracts, that I need to review later. To ensure I don’t miss anything, I’ve set up a rule to flag any incoming emails with attachments automatically. This helps me quickly identify and prioritize those emails for review.
Auto Forward Project-Related Emails to My Team
For ongoing projects, keeping my team informed is crucial. Hence, I’ve set up a rule that automatically forwards emails related to the project to the relevant team members. This eliminates the need to forward each email manually and ensures that everyone stays updated in real-time.
Mark Emails From Specific Senders as Important
Emails from certain senders, such as my manager or key clients, often require immediate attention. I’ve created a rule that marks any email from these individuals as important, highlighting them in my inbox. This allows me to address any critical messages first.
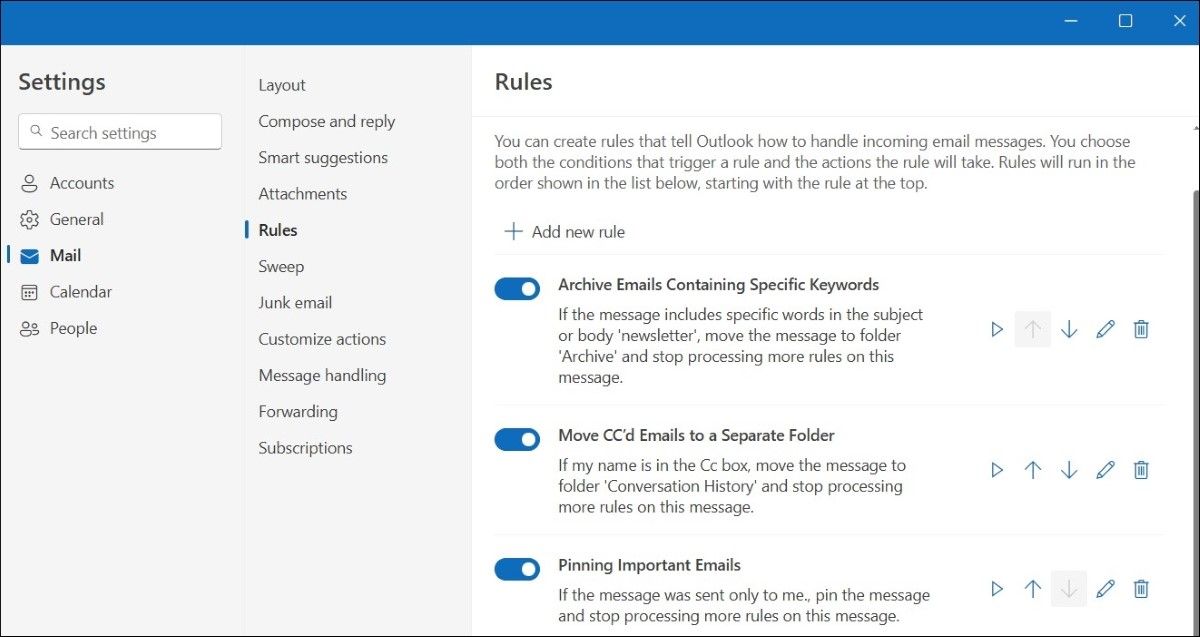
Archive Emails Containing Specific Keywords
To keep my inbox clutter-free, I’ve set up a rule that automatically archives emails containing specific keywords. For instance, recurring newsletters or updates that are not useful to me are moved directly to my archive folder.
Move CC’d Emails to a Separate Folder
Being CC’d on emails is often informative, but these messages don’t always require immediate action from me. I’ve set up a rule that moves all CC’d emails to a separate folder. This way, I can review them at my convenience without letting them distract me from more urgent matters.
Managing a Rule in Outlook
Outlook offers several useful options for managing rules—running them as needed, editing them to fit new priorities, deleting old ones, or reordering them. To access these options, all I have to do is head to Settings > Mail > Rules in Outlook. This section gives me a clear overview of all the rules I’ve created, and from here, I can easily take control of them.
When I want to run a rule manually, for instance, it’s as simple as clicking the play button next to the rule. If a rule isn’t working as intended—perhaps I need to add a new condition or modify its action—I can click the pencil icon to edit it.
By using the up and down arrows next to the rules, I can easily reorder them, ensuring that the most critical rules are applied first. Disabling the toggle on the left allows me to temporarily pause a rule without deleting it. Finally, if a rule has outlived its usefulness or is no longer relevant, I can simply click the trash icon to delete it.
Outlook rules make it easy for me to focus on what matters most without being bogged down by clutter. If you are also looking to declutter your inbox and streamline your email management, consider setting up rules in Outlook according to your preferences and see how it goes.
