Various factors can make your BIOS (or UEFI) inaccessible, from a system that’s seized up to not seeing the prompt appear at all. If you can’t get into the BIOS menu, here are some troubleshooting steps you can try.
1 Plug In a Wired Keyboard
Let’s start with the most obvious reason. You’d normally press the F2 or DEL key at boot to enter your BIOS. But what if you see the prompt and press the keys, but nothing happens?
The problem might stem from using a wireless or Bluetooth keyboard. Many of these devices aren’t available at boot until you get to Windows, so your key presses don’t register.
The easy answer is to plug in a wired USB keyboard and use it to press the F2 or DEL key. I’d also the USB ports on the back of the PC just in case.
2 Use Windows Advanced Startup
Maybe you’ve seemingly done everything right with the keyboard, but your BIOS still isn’t responding. To rule out a keyboard issue, let Windows enter the BIOS for you.
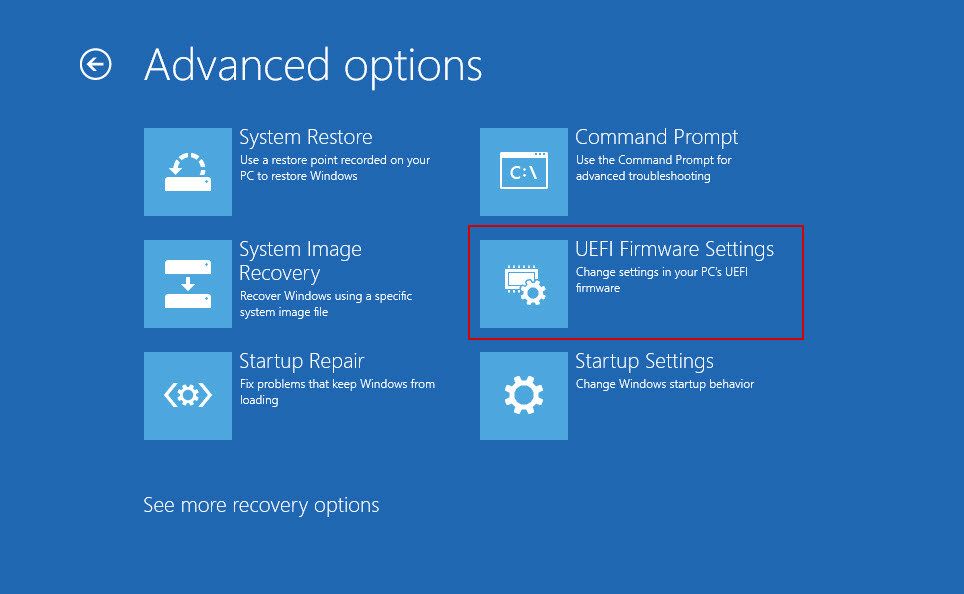
Windows has an “Advanced Startup” feature that lets you automatically enter the BIOS on Windows 10 & 11 when you restart. On Windows 11, you can simply head to Settings > System > Recovery and click Restart now next to Advanced startup.
After putting in the request to restart your system this way, Windows should send you into the BIOS menu automatically.
3 Disable Windows Fast Startup
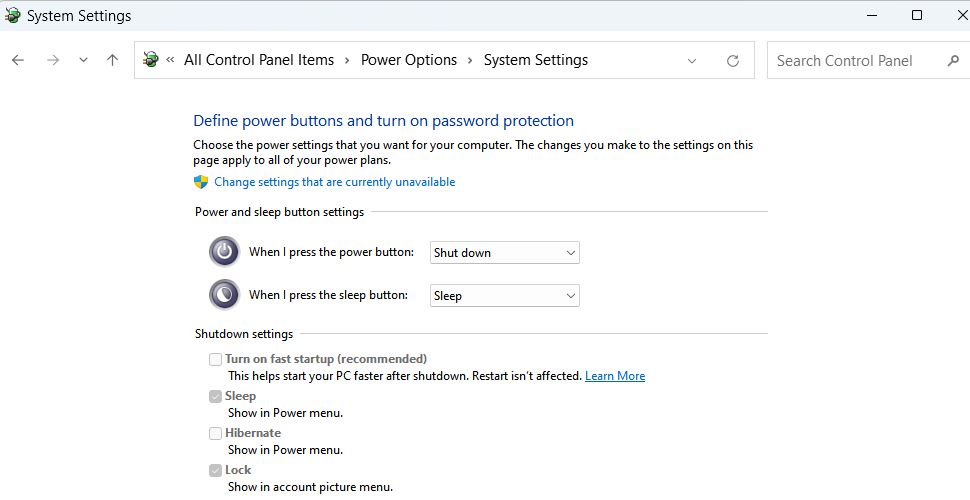
Did you know that both Windows 11 and Windows 10 have “Fast Startup” enabled by default? It works by secretly resuming Windows quickly from hibernation instead of going through the slower process of a cold boot.
The downside of this feature is that it can skip the BIOS splash screen. If for some reason you never see the BIOS prompt and your PC jumps straight to Windows—even after a full shutdown—the culprit might be Fast Startup.
To get a normal boot with a BIOS prompt again, disable Fast Startup. You can turn Fast Startup off on Windows 11 and 10 by accessing the Control Panel and going to Power Options.
4 Switch the Display to On-Board Graphics
Could your GPU be inadvertently causing a problem? If your monitor is plugged into your GPU, your motherboard might unexpectedly skip straight to loading Windows. Older motherboards didn’t behave this way, but some newer boards skip the BIOS prompt if they don’t immediately detect an output from your GPU.
To rule out this problem, switch where your monitor is plugged in. This method only works if your motherboard or CPU comes with integrated graphics.
Unplug the HDMI/DisplayPort cable from your GPU and plug it into your motherboard’s graphics port instead. In a standard PC case, the on-board graphics port is typically located higher up than the GPU’s port.
If this solution worked, then the BIOS prompt should appear now, and pressing the F2 or DEL key should grant you access.
5 Connect the Monitor to the GPU’s First Output
Here’s an issue I’ve seen crop up recently when you have a GPU in addition to having the “fast boot” setting enabled in your BIOS. The motherboard will jump past the BIOS prompt in less than a second and load Windows.
If you mash the F2 or DEL key during this brief window, why won’t it let you in? On some boards, “fast boot” causes the system to only check for a display on the GPU’s first output. If no display is detected there, it will skip the BIOS prompt entirely.
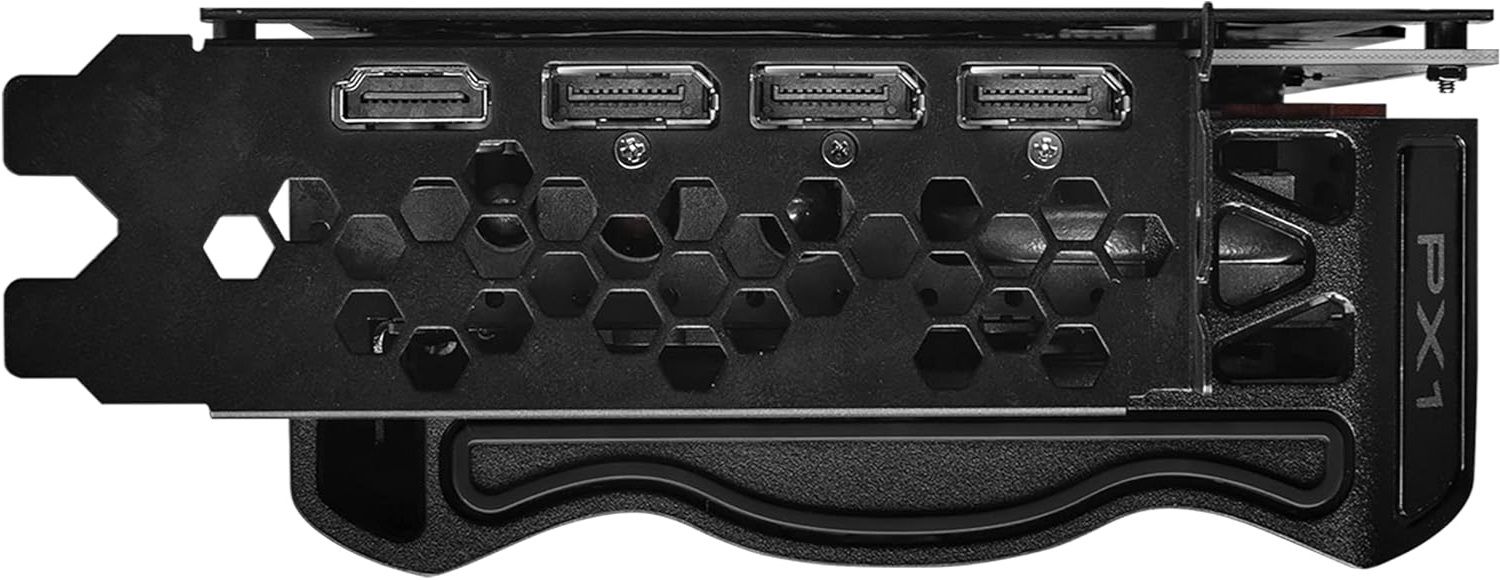
To check if “fast boot” is the cause of your woes, plug your monitor cable into the GPU’s first video output. The GPU’s first output is usually the left-most port (although there’s a slight chance it could be the right-most port).
6 Move the GPU to the Primary PCIe Slot
Here’s yet another unexpected issue that can occur if your PC has a discrete GPU. A typical ATX motherboard will offer multiple slots for peripheral hardware, and your GPU is connected via one of these PCIe slots.
A combination of these factors below can cause the BIOS prompt to not appear:
- You’ve installed your PC’s graphics card into a non-primary PCIe slot.
- You’ve enabled the “fast boot” setting in the BIOS.
- You’re using a vertical GPU mount for aesthetics.
Why would the slot the GPU is connected to matter at all? Some motherboards give the primary PCIe slot priority for “fast boot” and will skip the BIOS prompt if something goes wrong with detection there.
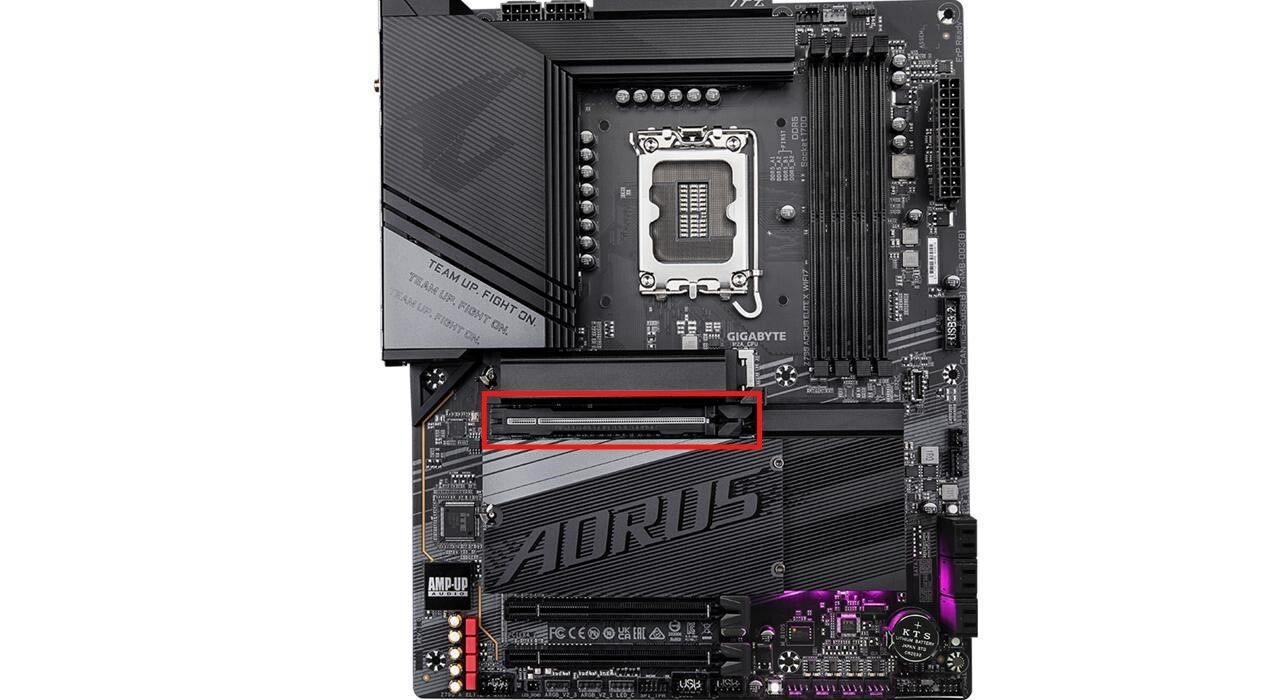
The primary PCIe slot is the one highest up when mounted in a standard PC tower, which is usually the slot closest to your CPU:
If your PC starts with a blank screen and jumps straight to Windows, try moving your GPU to the primary PCIe slot. Doing so may get the BIOS prompt to reappear and respond to keyboard presses again.
7 Reset BIOS to Factory Defaults
Now, we’ve come to the nuclear option—resetting your BIOS settings to factory defaults.
Why is going this far necessary? Certain conditions can cause the BIOS prompt to never appear. For example:
In these cases, resetting your motherboard to factory defaults should restore normal access to the BIOS.
Press the BIOS Reset Button
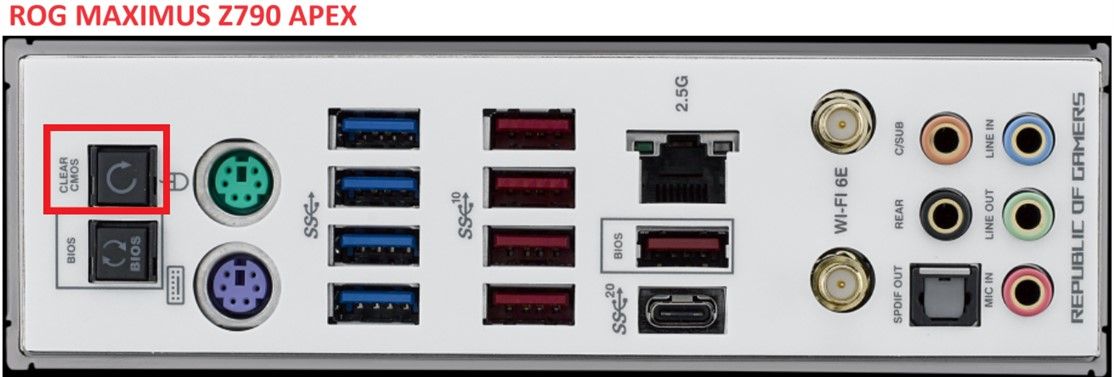
Perhaps the average user doesn’t need an expensive motherboard, but when choosing a new motherboard for my PC, there’s one premium feature that I can’t live without: a dedicated BIOS reset button.
This button lets you reset the BIOS to factory defaults without having to open your PC’s case. If your motherboard came with one, you’ll find the button on the back of your case.
On my Asus motherboard (and many others), here’s how you’d use the button to reset the BIOS:
- Shut down your PC and unplug its power cord.
- Hold down the CLEAR CMOS button for 10 seconds and then release it.
- Reconnect the power cord, and turn your PC back on.
If everything worked, your BIOS should’ve been reset to default settings. The BIOS prompt should appear when you boot, and you should be able to enter the BIOS by pressing the F2 or DEL key
Remove the CMOS Battery
Most motherboards rely on a small battery to save BIOS settings when your PC is powered down. If you’re locked out because you accidentally set a BIOS password or forgot what it was, this method should clear the password and let you in.
With your PC unplugged from power, you’ll want to remove your computer’s CMOS battery and put it back in. Doing so will wipe the current BIOS settings and restore them to default values.
If you were successful, you should get a message when you boot that the default settings have been restored. Now, you should be able to push the F2 or DEL key like normal to access the BIOS.
Clear Settings With Jumper Pins
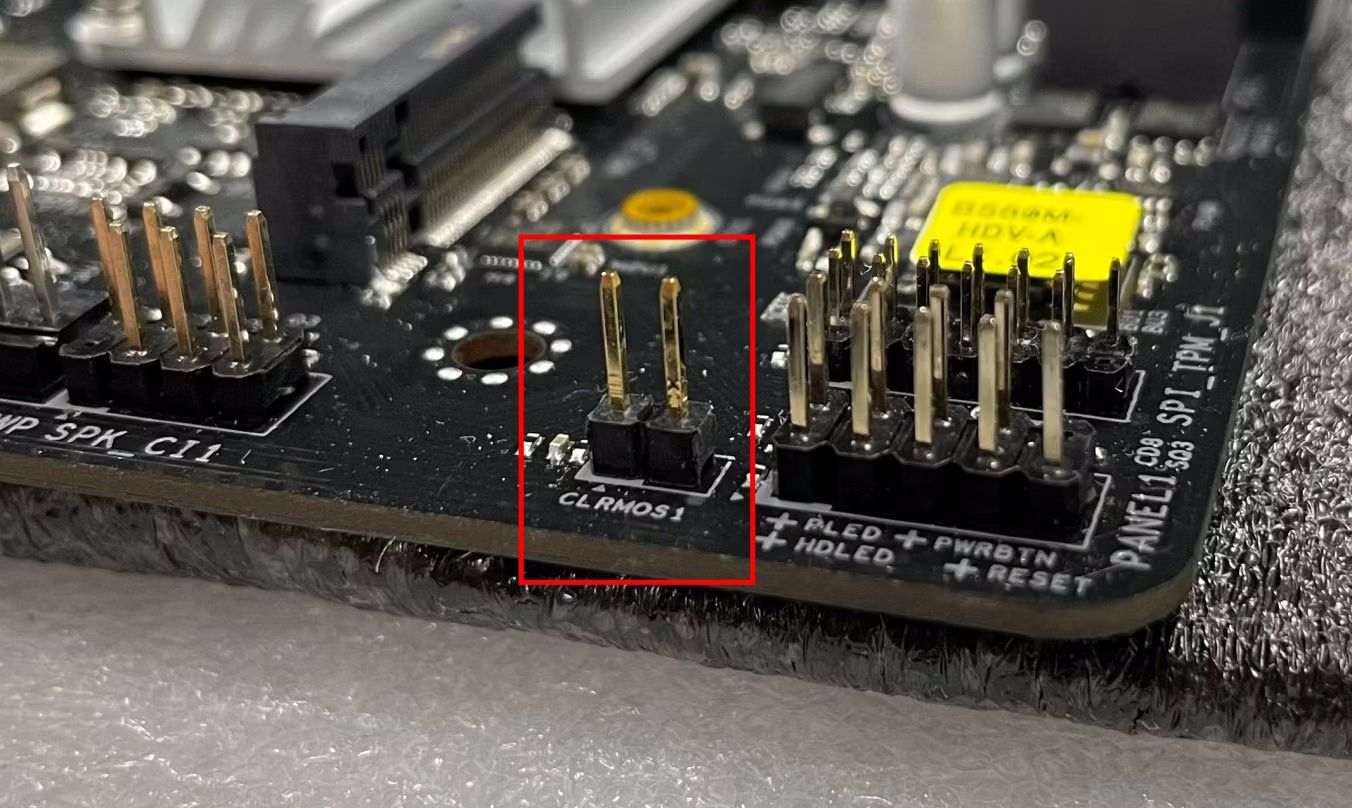
If none of the options above are available, the last resort is to use the plain old textbook method. Moving the jumper on your motherboard’s CLR_CMOS pins will clear the BIOS settings. This method is my least favorite option because it involves digging through a manual and reaching fingers into tight spaces.
Here’s how the procedure generally goes, but you should refer to your motherboard’s manual for specifics:
- Shut down your PC and unplug its power cord.
- Move the jumper over one pin. Wait 10 seconds.
- Move the jumper back to its original position.
- Plug the power back in, and turn your PC on.
If you were locked out of your BIOS, hopefully, one of these methods got you back in. If you’ve successfully fixed the problem but it returns later, this might be a good reason to update your PC’s BIOS to improve system stability.

