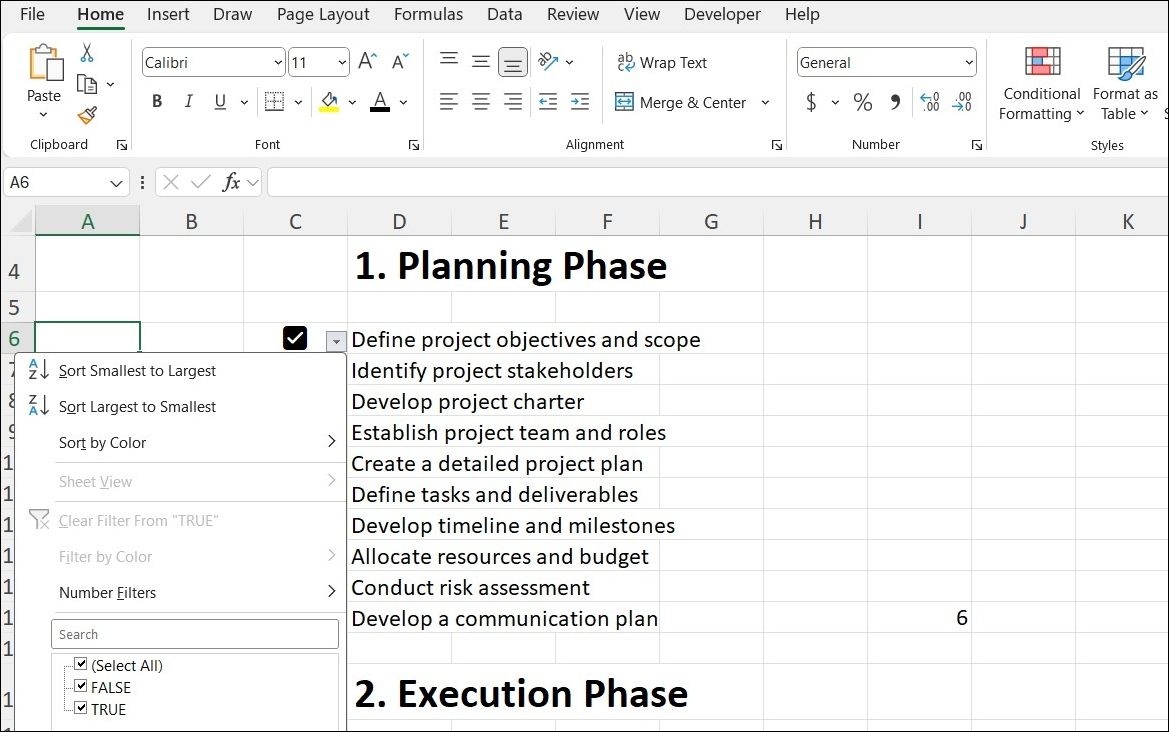
Adding checkboxes is a straightforward but effective way to add a touch of interactivity to your Excel spreadsheets. With checkboxes, you can easily manage tasks, track progress, or create dynamic dashboards. Here’s how you can use them.
Inserting Checkboxes Into Your Spreadsheet
Whether you want to create a to-do list or set up an interactive form, inserting checkboxes in your Excel spreadsheet is quick and easy. Here are the steps you need to follow.
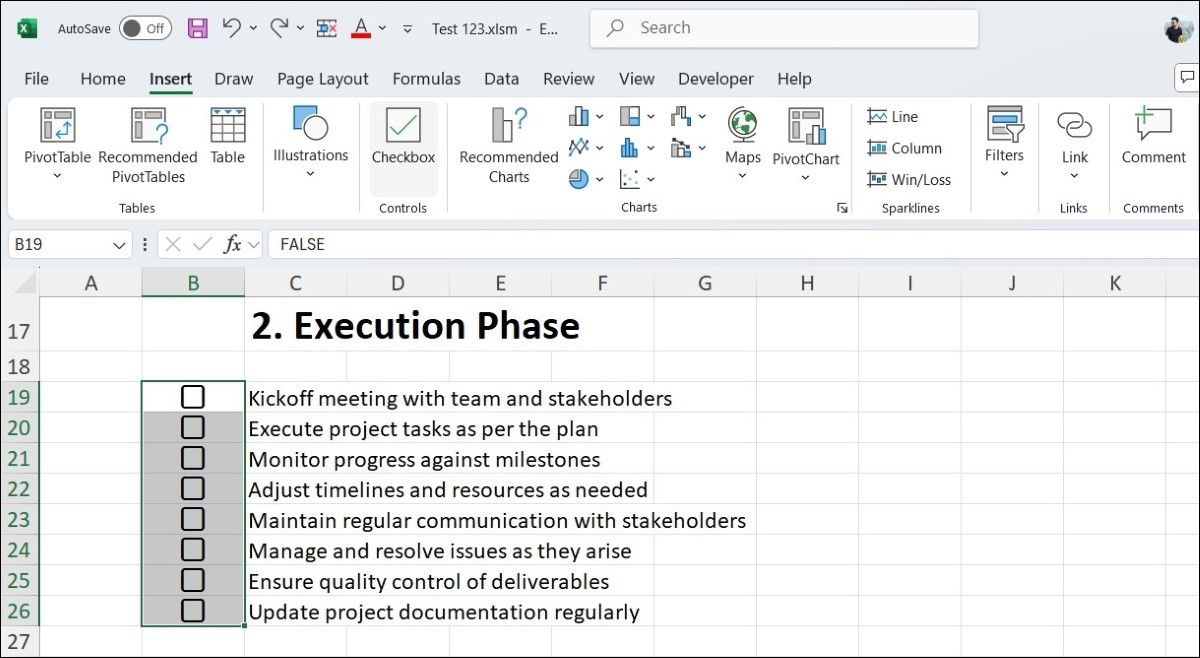
- In your Excel spreadsheet, select the cell or range where you want checkboxes.
- Go to the Insert tab.
- Click on Checkbox in the Controls group.
And that’s it! Unlike before, you no longer need to use the Developer tab to insert checkboxes. Excel’s latest versions offer a built-in, native option for inserting checkboxes, streamlining the process.
Formatting Checkboxes in Excel
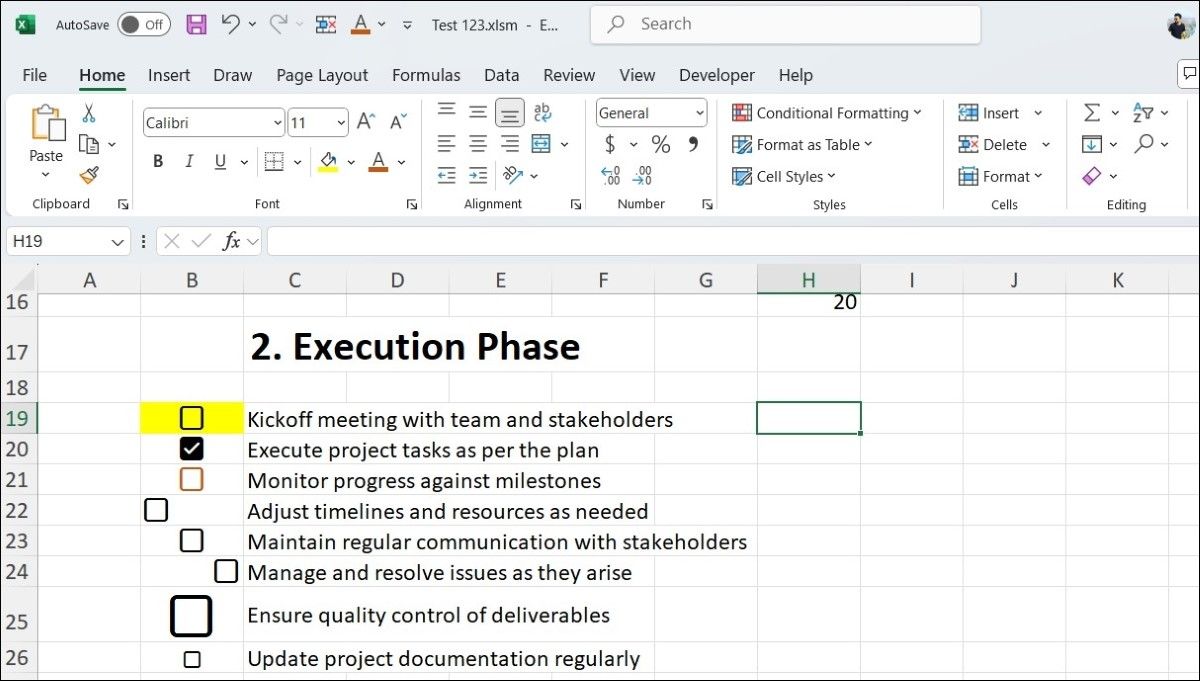
Once you’ve inserted checkboxes, you can also format them to make your spreadsheet more visually appealing. Excel provides several options for adjusting the appearance of checkboxes, including size, color, alignment, and more. The process is similar to formatting text. Here’s how you can do it.
- Simply select the checkbox you want to format and go to the Home tab.
- Use the Fill Color and Font Color options to change the color of the checkbox or the cell.
- Use the Font Size drop-down menu to adjust the size of the checkbox.
- To position the checkbox within the cell, click the options in the Alignment group (left, right, or center) as needed.
You can also use conditional formatting to visually highlight checked items. For example, you can strike through tasks that have been completed by applying a rule that formats any row with a TRUE value in the linked cell.
Removing Checkboxes From Your Spreadsheet
If you no longer need checkboxes in your Excel sheet, removing them is just as easy. Start by selecting the range of cells containing the checkboxes you want to delete, then press the Delete key on your keyboard.
If the checkboxes are all unchecked, they will be immediately removed. However, if any are checked, pressing Delete once will only uncheck them. Press the Delete key again to completely remove the checkboxes from your spreadsheet.
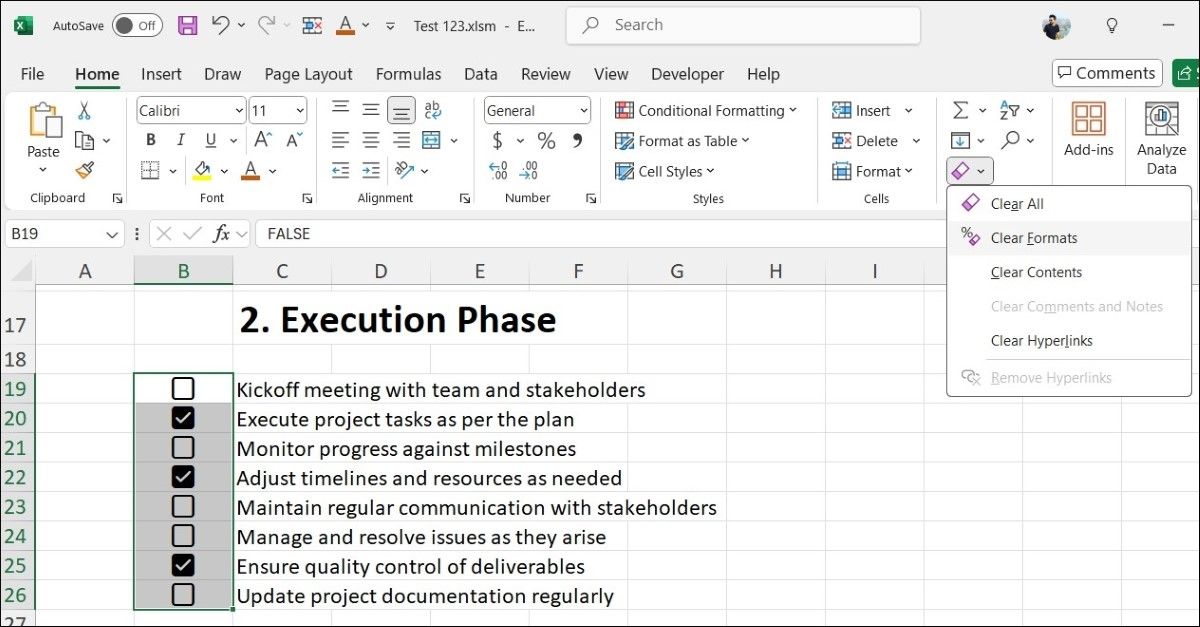
Note that checkboxes in your Excel spreadsheet are linked to TRUE and FALSE values through checkbox formatting. If you want to remove only the checkboxes while keeping the TRUE/FALSE values, go to Home > Clear > Clear Formats.
Creating Interactive Lists and Analyzing Checked Items
Using checkboxes in your spreadsheet makes it easy to track tasks, manage inventories, or create dynamic to-do lists, providing an intuitive way to mark items as complete or incomplete. Additionally, you can use formulas to analyze checked items and automate calculations based on your selections.
Counting Checked and Unchecked Items
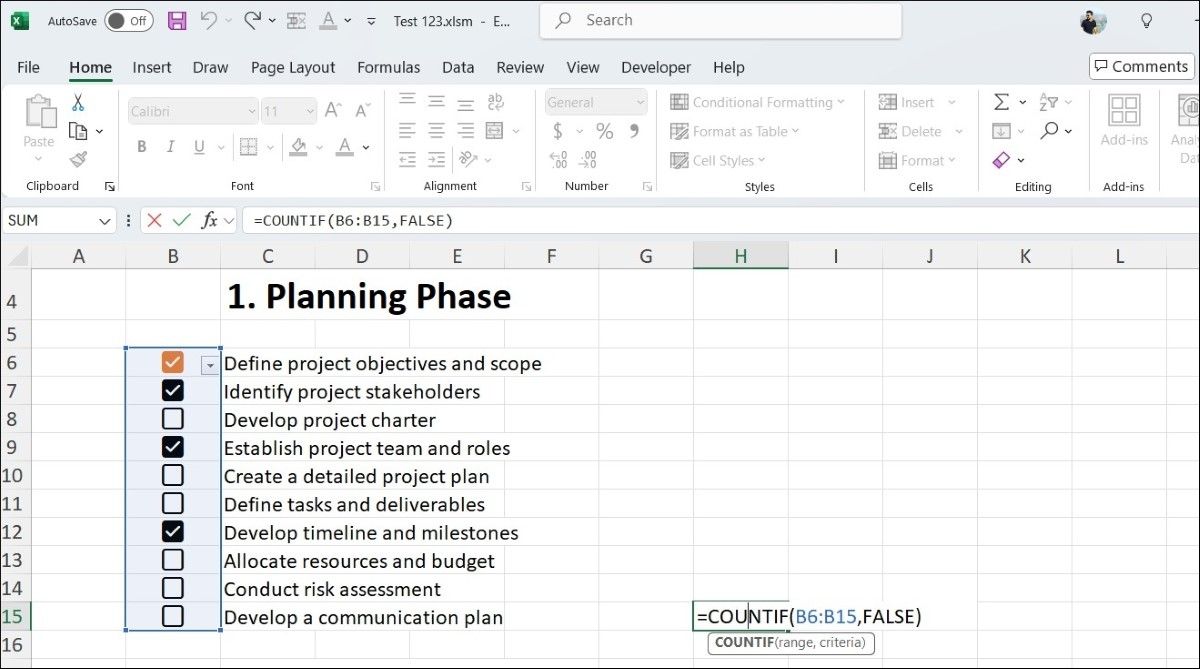
You can use the COUNTIF function to count the number of checked or unchecked items in your list. For example, to count the number of cells with the FALSE value (i.e., unchecked) between B6 and B15, you would enter the following formula:
=COUNTIF(B6:B15,FALSE) Summing Values Based on Checked Items
If you want to sum values corresponding to checked items, such as calculating the total cost of completed tasks or purchased items, use the SUMIF function. Assuming the values you want to sum are in column C and the checkboxes are in column B, you can use the following formula:
=SUMIF(B6:B15, TRUE, C6:C15) Filtering Your Checklist
Once you’ve linked checkboxes and set up formulas, you can further enhance your interactive list by applying filters. This allows you to easily view only checked or unchecked items on the list. Here are the steps you need to follow.
- Select the range of your list, including the checkbox column.
- Go to the Data tab and click Filter.
- Use the filter dropdown in the checkbox status column to deselect (Select All).
- Select either TRUE (checked) or FALSE (unchecked) to filter your list accordingly.
- Click OK.
Integrating checkboxes into your Excel sheets can significantly enhance interactivity and usability. Furthermore, by configuring your sheet to update related data or trigger actions based on checkbox selections, you can transform a basic spreadsheet into a dynamic tool.

