Key Takeaways
- Your Chromebook most likely has a built-in Screen Capture tool for quick, easy screen recordings.
- The Screencast app adds functionality like editing, transcripts, and annotations.
- Browser extensions and apps like Awesome Screen Recorder & Notta provide additional features for screen recording and editing.
With built-in tools, dedicated apps, and even browser extensions, recording your Chromebook screen has become much easier. Below, I’ll share three easy ways to do so, whether you need a quick video or more advanced editing options.
With a Chromebook running Chrome OS version 89 onwards, you’ll have access to the Screen Capture Tool. This tool is the simplest way to record your screen, and it even allows you to record yourself all at once.
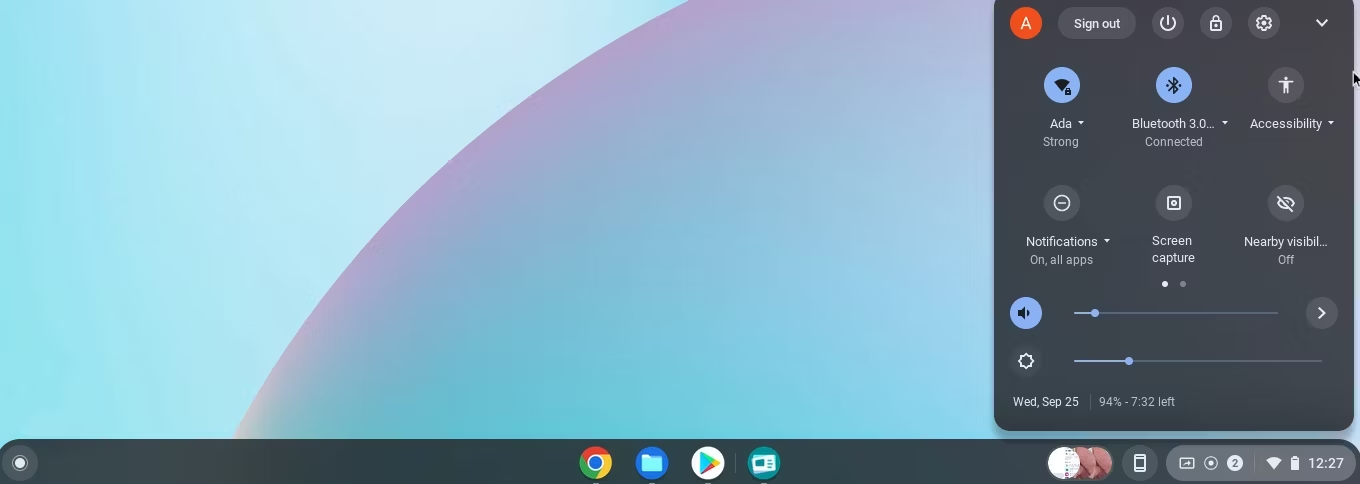
To launch the Screen Capture tool, click on the status bar (the one with the time, battery, etc.). A menu with various options will appear. Locate and click Screen capture.
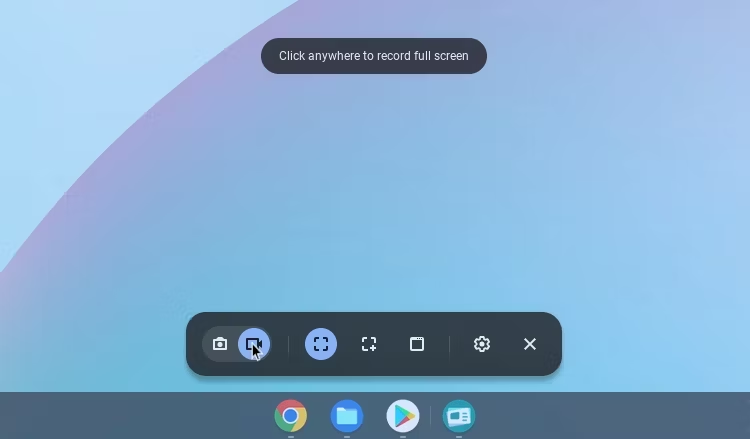
Alternatively, you can launch the tool by pressing Ctrl + Alt + Overview (the key that looks like a rectangle with two lines). Once it launches, select the record video option (the second icon from the left) instead of screen capture.
There are three ways you can record your screen.
- The first option (third icon from the left) is to record your full screen. You’ll record everything on your screen, including your taps, taskbars, or window switches.
- You can record a partial screen, i.e., a portion of the window you’re currently on.
- Finally, you can record an entire window. This will be the Chrome window or app you’re on when you launch the tool. Even if you leave the window while recording, it will only capture what’s displayed in that window.
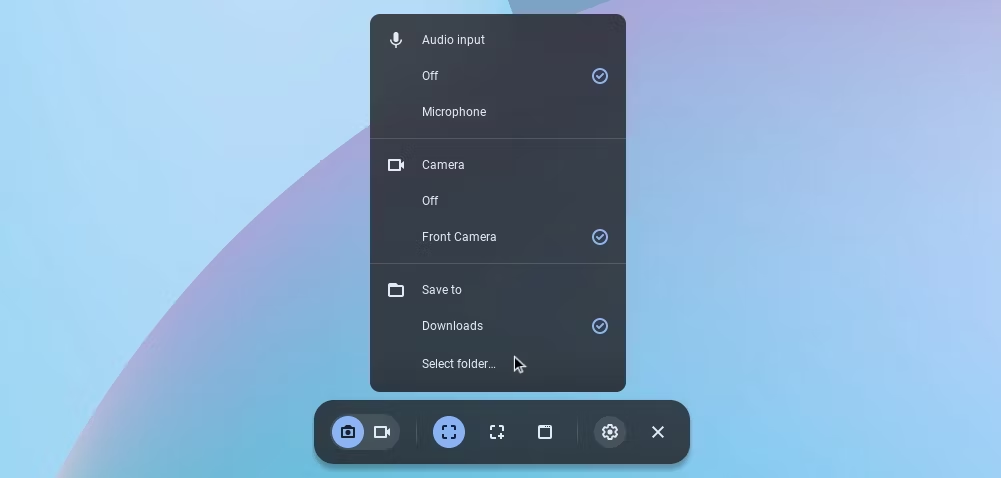
Clicking the Settings icon allows you to turn on your camera, enable your microphone, or select a download location.
Once everything looks alright, follow the on-screen prompts to start recording your screen. If you use your camera, you’ll see a pop-up of yourself as you record.
Once you finish recording, your video will be saved in the Downloads folder (if you didn’t change the download location) and ready to be viewed, shared, or edited.
Use the Screencast App to Record Your Screen
If you want more advanced features, like transcriptions, annotations, and easy sharing, the Screencast app is another excellent tool. And it’s equally easy to use.
Open the app from your app launcher and click + New Screencast to start a new recording. Your device’s language must be one of Google’s supported languages. Otherwise, the button will be grayed out, and you won’t be able to add a new screencast.
The Screencast App uses the Screen Capture tool, so when you try to add a new screencast, you’ll see the same interface as if you went through the Screen Capture tool. Since the Screencast app is solely for screen recording, you won’t find the screenshot option. You won’t find the download folder settings here either, as all your screencasts will be automatically uploaded to your Google Drive.
You’ll still have to select whether you want to record a window, your whole screen, or a part of your screen and toggle on or off your front camera and microphone. However, you’ll be able to annotate as you record your videos by clicking the marker tool beside your status bar.
Once you’re done recording, the video will be automatically uploaded and available for you to edit within the Screencast app. When you click on the video, you’ll find an auto-generated transcript to the right.
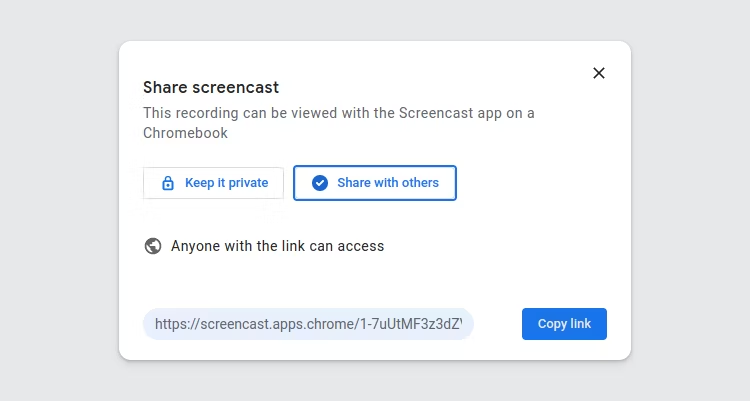
You can click on the sections to hide them or edit the text. Once you’re done making edits, you can share your screencasts. Click Share, rename your screencast, and Keep it private or Share with others.
This app is especially useful when you need to explain something in detail, as it even allows you to export transcripts.
Try Browser Extensions or Chromebook Apps
If you’d like a little more features than what the Screen Capture and Screencast Tools offer, several browser extensions and Android apps are available. Each offers unique features that make it stand out.
For instance, the Awesome Screen Recorder & Screenshot extension offers all the features that Screencast offers. It then allows you to select your preferred dimensions—720p, 1080p, or 4K—and any one of the two common video formats available—WebM or MP4. Meanwhile, the Notta extension allows you to record your screen during meetings and transcribe the audio in over 50 languages.
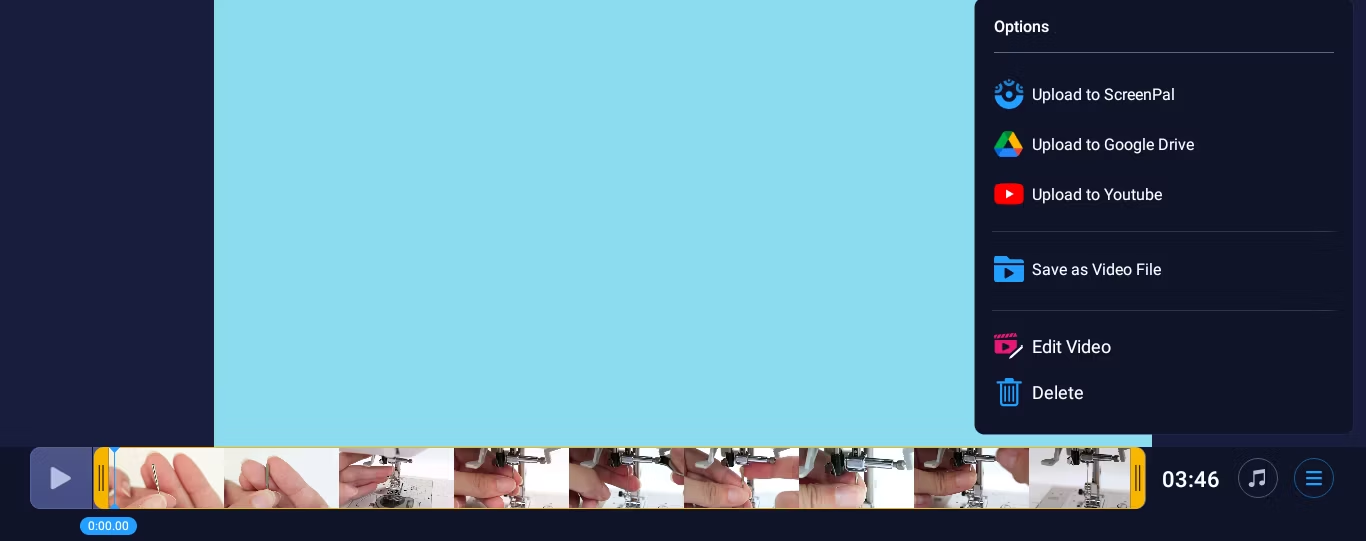
If you’d rather download an app, I tried out ScreenPal’s Screen Record-Edit: Chromebook app. It was quite efficient and easy to use. I could record my entire screen, a window, a Chrome tab, my webcam, or my webcam and my screen. I also had the option to share my system audio and enable my microphone.
After recording, I was able to access my video in the app, and I had several sharing options, as well as a few editing options.
Download: Awesome Screen Recorder & Screenshot (Free, subscription available) | Notta (Free, subscription available) | Screen Record-Edit: Chromebook (Free, In-app purchases)
Many of these extensions and apps offer free versions with basic video editing features, like video trimming and the option to add music tracks. Feel free to explore more browser extensions and apps to find the best fit for you.

