
Quick Links
Key Takeaways
- Create popular movie effects using just your smartphone and a video editing app, no expensive equipment needed.
- Techniques like the vertigo effect, lens flare, and stop-motion animation can be easily recreated on your phone.
- Use features like time-lapse, green screen, and slow motion built into your smartphone’s camera to enhance your videos.
With the growing camera and computing capabilities of smartphones today, creating movie-style video effects on your smartphone has never been easier. You don’t need expensive equipment or even a PC to achieve these effects seen in films. I’ll walk you through some of the most famous techniques and how to recreate them all on your phone.
1 Vertigo Effect (Dolly Zoom)
The Vertigo Effect, also known as the dolly zoom, creates a disorienting visual where the background seems to change size while the subject remains the same. You’ll see this in movies like Jaws and Vertigo.
A vertigo effect is traditionally created by simultaneously zooming-in on the subject while also backing away from the subject. Although we can certainly do this on our smartphone, an easier way would be to edit the video in post.
Here’s how I do it:
- Set the video resolution to max. I recommend shooting in 4k or even 8k if your smartphone is capable.
- Set your smartphone’s camera to capture using the ultrawide or wide lens.
- Start recording near the subject, then slowly back away while making sure that the focus stays on the subject.
- Import the clip to your editing app and place it on your timeline.
- Select the clip and add a keyframe at the beginning by tapping the keyframe tool indicated by a diamond icon.
- Go to the end of your clip, then zoom in on the subject until it is centered and is around the same size it was at the beginning of the clip.
- Place the ending keyframe by tapping on the keyframe tool once more. Make sure that you’re still on the ending frame when adding the end keyframe. Then save and export.
Though you can use regular angle shots to take the vertigo effect, a wider angle makes the effect more noticeable. You can also speed up the video to further exaggerate the vertigo effect.
2 Slow Motion Effect
The slow-motion effect is used to emphasize a specific action or add drama to a scene. You see it all the time in action movies and sports highlights. Most phones today have slow motion built-in within its native camera-app.
However, these modes do not provide much flexibility and make it harder for you to control the quality and framerate of your video. A better approach would be to shoot in normal mode and edit it later using your favorite editing app. Here’s how:
- Set the camera framerate to 60 or even 120 if your phone is capable.
- Shoot the desired moving subject.
- Open your favorite editing app on your phone, create a new project, import your clip, then place it on your editing timeline.
- On your timeline, tap on your video clip and shorten the clip duration to create the effect. Save and Export
As a rule of thumb, you’ll want your slowed down scene to be at least 24 frames/sec. Anything slower than that would start to make the clip choppy or jerky. So, if you shoot the video at 60 frames/sec, you can slow it down by -2.5x to -3x with little compromise on framerate.
3 Lens Flare
Lens flare adds a dreamy, cinematic touch to scenes by capturing bright light directly hitting your lens. It’s a favorite in sci-fi and action films
You can incorporate the lens flare effect if you:
- Dip the tip of a toothpick or needle in oil or moisturizer and use it to draw a straight vertical line on the lens of your phone camera. The grease will bounce the light on your lens, which will help create the lens flare.
- Record a scene with a strong light source, such as the sun or a streetlamp, in the frame. Playing with natural lighting is crucial for creating authentic lens flare.
- Slightly angle your phone, so the light creates a flare effect. You can further enhance this by adding overlay effects.
There are many other ways to create lens flare using your smartphone, but the simplest I’ve found would be to simply put a thin line of grease or moisturizer on your lens.
4 Stop-Motion Animation
Stop-motion animation is a technique where individual frames are captured one at a time, with slight movements in between each shot. When the frames are played in sequence, it creates the illusion of movement. This method is commonly used in films like The Nightmare Before Christmas and Wallace & Gromit.
It’s perfect for bringing inanimate objects or miniatures to life, and surprisingly, you can achieve this using just your smartphone by doing the following:
- Choose a well-lit location and make sure your phone is mounted on a tripod or stable surface to keep the camera steady.
- Position your subject, take a photo, then make a slight movement and take another photo. Repeat this process, ensuring that each movement is small and precise.
- The more frames you capture, the smoother your animation will be. Aim for around 24 frames per second for fluid motion, which means you’ll need to capture many stills to create even a short clip.
- Once you’ve captured all the frames, import them into your app’s timeline. Adjust the speed or delete any unwanted frames to refine the animation.
- Export the animation as a video clip. You can then share it or incorporate it into a larger project.
Stop-motion can take up a lot of time and effort to make. To help make the process easier, you can try using dedicated stop-motion apps. Additionally, getting a Bluetooth-controlled shutter remote for your phone can help you hasten the process while shooting.
5 Time-Lapse
Time-lapse condenses hours of footage into a short clip, creating an accelerated view of processes like sunsets or traffic. It’s a classic technique for showing the passage of time. The most efficient way of taking a time-lapse is by simply using the time-lapse feature on your smartphone.
Here’s how you can do it:
- Set your phone on a tripod or a stable platform such as a table.
- Frame your shot and keep your phone as steady as possible by placing weights on your tripod when it’s windy.
- Select the time-lapse feature on your camera app.
- Record for several minutes to hours, depending on the subject.
- You can further speed up or slow down your time-lapse footage by adjusting the speed in post-editing. Many smartphones have built-in time-lapse features, but you can enhance the effect by adjusting speed or adding transitions.
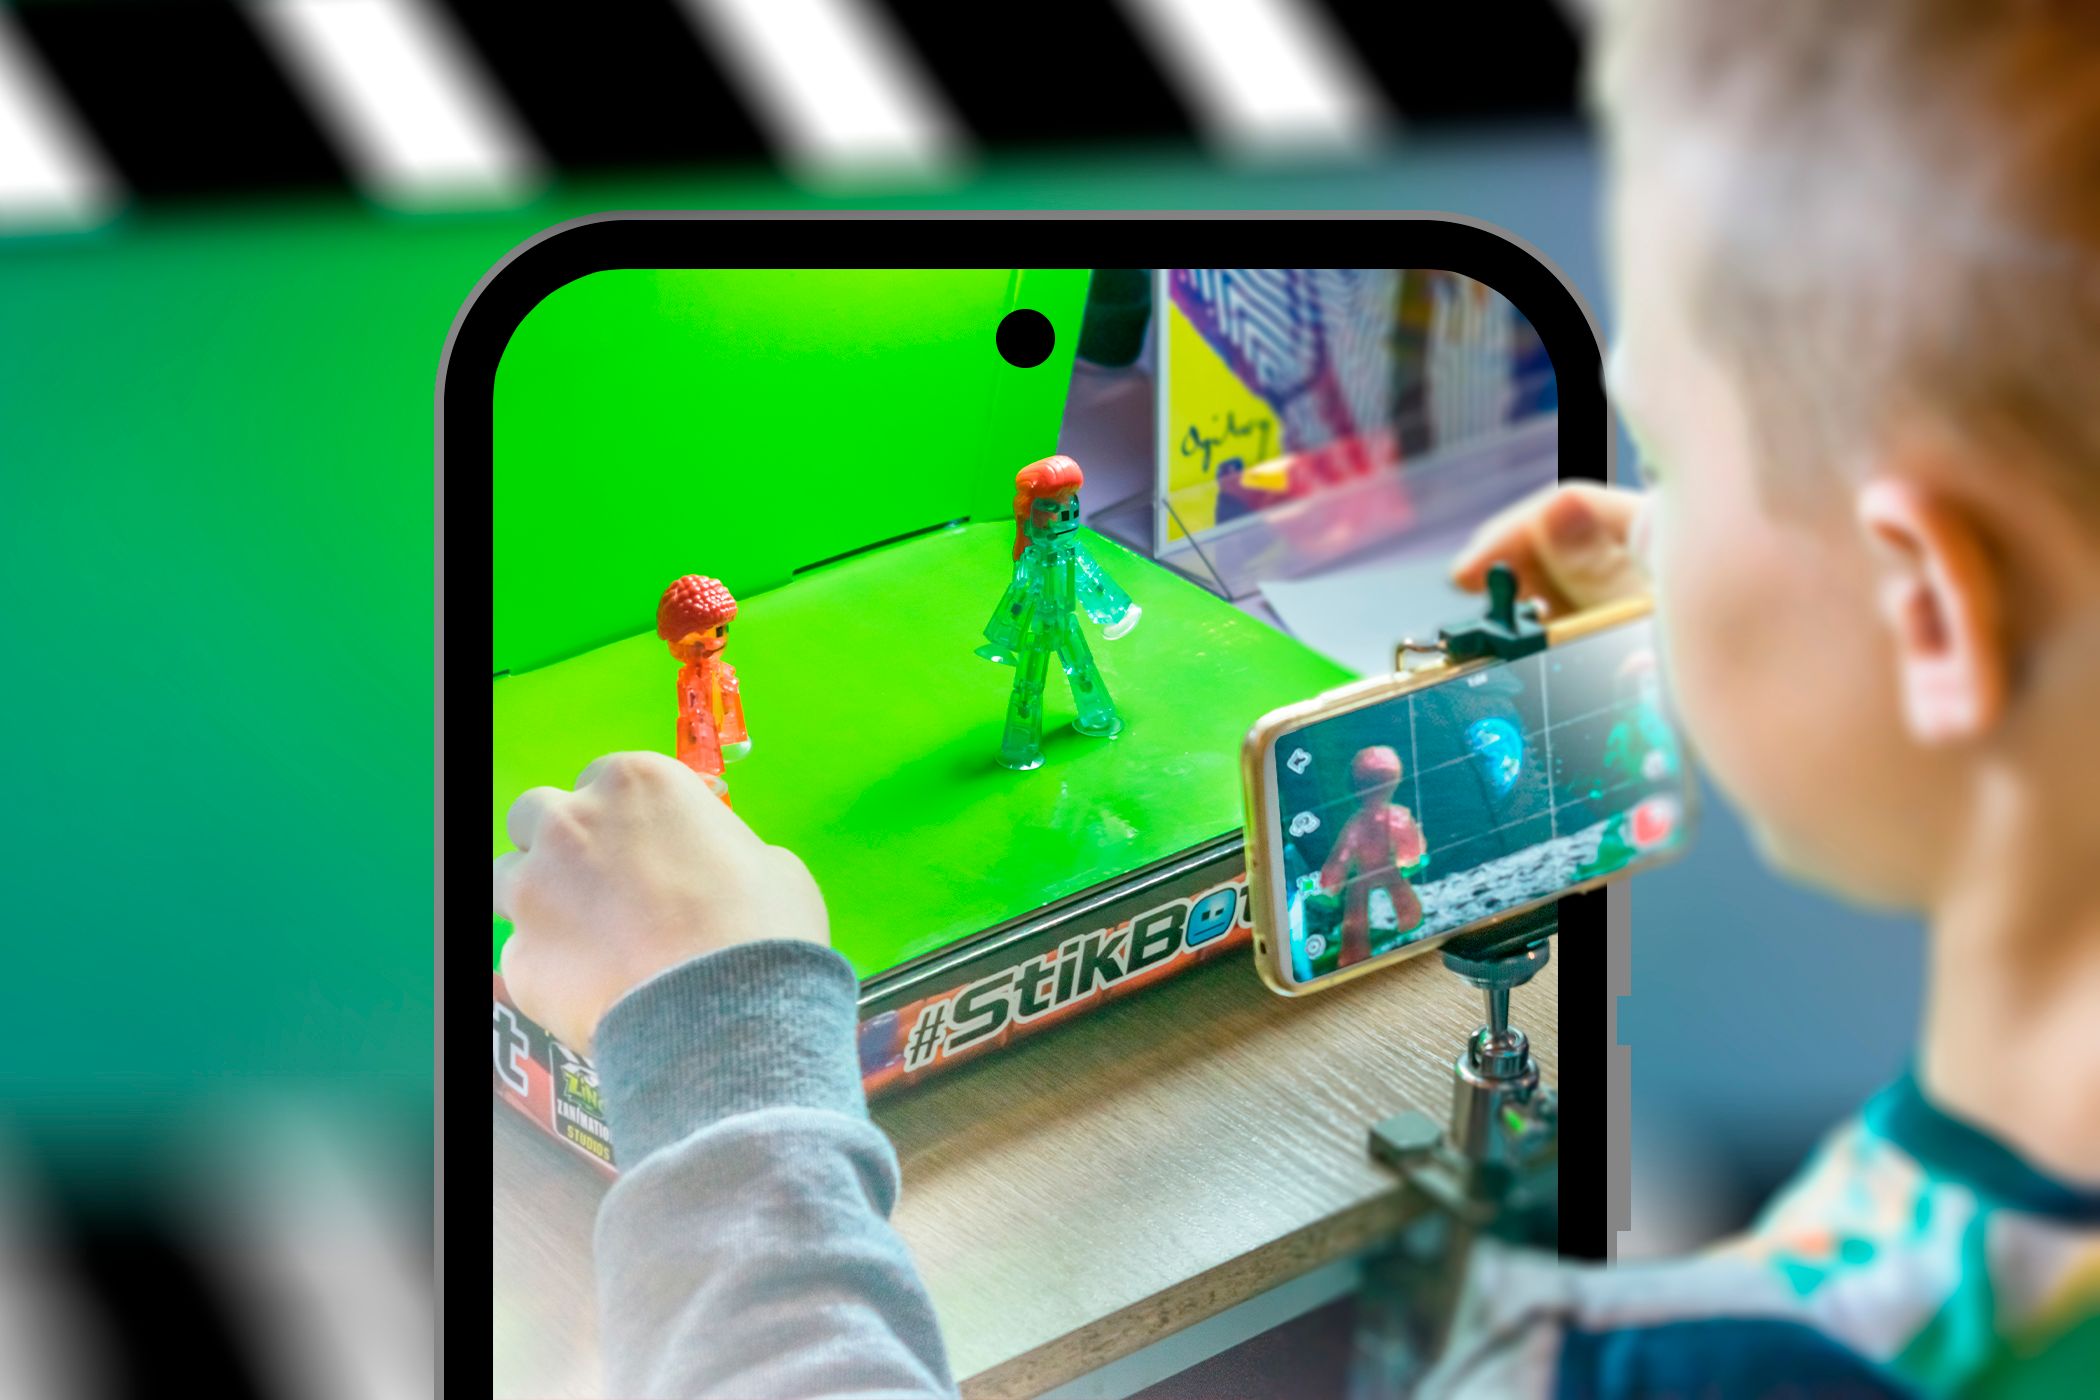
6 Chroma Key (Green Screen)
This technique is used to replace a background and add special effects which you’ll often see in news broadcasts and many blockbuster films. It’s easy to pull off using a green screen and the chroma key feature found in most editing apps.
Here’s how:
- To change the background of your subject, you’ll want to set up a green screen or a solid green background.
- Record your subject in front of it.
- Import the video into your editing app and select the clip with the green background.
- Tap on the “Chroma Key” and use the color picker to choose the green area. Adjust the “Intensity” to remove the background, and insert any video or image you want in its place.
You don’t need a fancy camera to pull off incredible movie-like effects. With just a smartphone and your favorite video editing app, you can recreate many of the techniques seen in popular films. Try these out in your next video project and watch how they elevate your storytelling!
